Showing posts with label healthy. Show all posts

Wednesday, August 26, 2015

Amazing rich mushroom gravy- no flour, no fat added!

I put together this tasty little gem after we tired of grilling lean turkey burgers and we realllly wanted some sauce for the amazing brown rice pasta I just found on Amazon. I was scared of pasta alternatives because I had tried a couple here and there and they just made me sad. But the reviews for this stuff were amazing, so I said what the hell. This is what it looks like and you can read the reviews for yourself here:


You know how everyone says that a lot of rare meats taste "just like chicken"? Well, I have to say- this stuff actually tastes just like regular pasta. You have to be careful with the cooking time, though. I cooked it for about 9 minutes, although it suggested 11-13 minutes. I just kept tasting to check for the right texture- which happened to be right around the 9 minute mark. I drained it and actually chose to rinse it in cold water. This is *not* something I would usually do with regular pasta, because the starch is great for catching and holding on to sauce. But in this case, reviews had said it could get mushy, and I really wanted to make sure it stopped cooking. So I gave it a quick rinse with a shot of cold water, and it turned out perfect. There was no odd flavor or aftertaste, and the texture was just what you would expect from a normal wheat-based pasta.

Ok, now that I got to get in my excitement about my new pasta, let's talk gravy. 


Mushroom Gravy: Ingredients

~8 ounces baby bella mushrooms, sliced
- 1/2 large onion, diced
- 4 cups broth- I used beef here and loved the meaty beef and mushroom combo, but you could also switch up the flavors and use chicken or veggie broth. 
- Rosemary- fresh or dried,to taste. I used ~ 1/2 tbsp
- Salt and pepper to taste
- Arrowroot or cornstarch

You need to start by browning the onions and mushrooms. Depending on your diet restrictions, you can a) use a bit of olive oil, b) spray the pan with some cooking spray, or c) cook the onions and mushrooms by putting a bit of broth in the pan at the beginning to keep everything from sticking. 

In the photos here, I used a shot of cooking spray, no additional oil or fat was added. I also used my magical Bialetti ceramic pan.... 

Once you have decided on your method, add that plus the mushrooms, onions, and a healthy dose of salt and pepper. Cook the onions and mushrooms over medium heat until they brown- you may even see some of the browned bits start to stick to the bottom of the pan. You want to take this opportunity to develop some serious flavor. The browning will make the veggies caramelize- the natural sugars in the onions will make them taste sweet, and the mushrooms will develop a savory meaty flavor. 

Once the onions and mushrooms are nicely browned, pour in 3 1/2 cups of broth, reserving the other 1/2 cup for later. Add in the rosemary. If you're using fresh rosemary, remove the leaves from the stem and give it a nice chop. If you're using dry, I would also suggest either chopping the rosemary or using a mortar/pestle to grind it down a bit. This is also personal taste- I just don't like chewing larger pieces of dried rosemary.... but I love the flavor. I used a mortar and pestle and just ground it down until it was mostly powder. 

Bring the sauce to a boil. Then turn it down to medium-low heat and let it cook.....


And cook....

Until it reduces by about 1/4 (approximately 15-20 minutes):


At this point, you could eat it as-is and it would be super tasty, but not very thick. You could continue to reduce it, but by further condensing the flavors, you might end up with an overly salty sauce. The other option is to use arrowroot or cornstarch, which is what I did here. The final 1/2 cup of broth was set aside for this purpose- use that to make a slurry with the cornstarch or arrowroot. The broth should be at least room temperature, if not cool, to be the most effective. Stir this mixture right at the end- if you continue cooking at a medium heat or bring the sauce to a boil after adding it, it may reduce the effectiveness of the thickener. 

Mix in enough of the slurry to get the consistency you want. Since you are using broth instead of water, it shouldn't water down your mixture- but may want to taste to see if any additional seasonings should be added prior to serving.

And voila! That's it! No added fat or flour and you can have rich, creamy myshroom gravy. T was craving salisbury steak (which neither of us has had in years), so we grilled some seasoned burger patties and then smothered that and the awesome brown rice pasta with the sauce. He dubbed it "the best salisbury steak he's ever had." Not sure what I'm being compared to, since most salisbury steaks come in frozen dinners...but I'll take it ;)


Tuesday, August 18, 2015

Savory french toast with tomatoes and basil


Yum. Yumyumyumyumyumyumyum.

I have been struggling with coming up with some healthy breakfasts that fit into an Fast Metabolism Diet (FMD) Phase 1 box...For those of you unfamiliar, it requires a whole grain (often in the form of oats or sprouted grain bread in this phase) and a fruit, and most vegetables are allowed. However, there are to be no added fats. So egg yolks are out, as is olive oil. A lot of people rely on oat-based meals (for example, the pancakes here). But I can only eat so many oats and I was aching for something new. The FMD book has a recipe for egg-white french toast with strawberries that became my inspiration for this recipe- that combined with a heaping bowl of red and yellow cherry tomatoes from the garden and a beautiful pot of basil outside my front door.   

For anyone not working within the FMD restrictions, this is still a dairy-free, no-added-fat recipe. You can even make it with gluten-free bread if your diet calls for reduced gluten. I used a sprouted spelt bread that we actually found at a local farmers' market over the weekend. On a sad note, I forgot to store the non-preservative-laced bread properly and it went bad after 4 days. Learn from my mistakes, people. 

Here are the ingredients you will need for 2 servings of the healthy version (See the notes that follow at the end regarding variations that could be made):

2 slices of sprouted grain bread
Approximately 1 cup of cherry or grape tomatoes
2 egg whites
Salt (ideally Himalayan sea salt)
Ground pepper
Chopped fresh basil
Optional:*(see note at bottom) 
Sliced onion
2 cloves of garlic, peeled
other seasonings such as garlic or onion powder, cayenne or red pepper flakes, etc...


Let's start by talking about the tomatoes. So what I have in the picture below are my "dueling tomatoes." Since this phase calls for no added fat, and cutting down on fats (but not cutting out!) isn't a horrible idea in general, I wondered what would happen if I roasted tomatoes just by themselves, in a non-stick pan, naked-style. The pan on the left has tomatoes that have been sprayed with olive oil, and the right side is nekked. Both have a light dusting of sea salt. I roasted them side by side in a 400 deg F oven.

Dueling tomatoes
After about 15 minutes, the tomatoes on the right, the non-fat tomatoes, looked like this:


Zero fat added
Aren't those awesome?? All caramelized and sweet and juicy.... I didn't end up taking a picture of the other pan, unfortunately, but they looked basically the same. Verdict: oil or any additional fat = unnecessary for roasting tomatoes. The juices they release during the cooking process are sufficient for making really tasty tomatoes. Sweet.


I'm glad we have that all figured out. So while your fat-free tomatoes are getting all sweet and gooey in the oven, you can prep the bread. For each slice, make a mixture of egg white (1 egg white or 3 tbsp of cartoned egg whites), salt, and pepper. This is also where you can also add any other seasonings that you think might taste good. Just remember that they should go along with the roasted tomatoes, so nothing that would add any additional sweetness. Use a whisk to combine the spices and the egg white, getting the white a little frothy. Place the bread in the mixture and let it sit a bit before flipping, allowing the egg white to soak in. This will depend on the type of bread you're using. If it is a long piece from a bread loaf (like the one below), I would suggest slicing it in half to provide more soaking surface. If it's a thinner piece, like Ezekiel bread, if you let it soak too long it will just fall apart- so just use your best judgment. Warm your non-stick pan over medium heat and then add the soaked bread. Let it cook for about 2-3 minutes per side, allowing each side to get a crispy brown. 


Browning the toast
Now here comes my favorite part: putting it all together.

First- the toast. Then the tomatoes, pressed down slightly with a fork to open them up and get them to stay put. Then the freshly chopped basil, finish with a touch of salt and fresh ground pepper to taste. 

At this point, you could eat it as-is and be super happy. Or this could also be the time for you to add any customizations you might want to experiment with. In the photo below, I added a drizzle of balsamic glaze (which I would argue should be a staple condiment in any home).
French toast  #1

*I mentioned some optional items...

...Let's talk about those: The second time I made this, I decided it needed a hit of garlic. I didn't think about it in time to toss the garlic in with the tomatoes, so I sliced the garlic in half lengthwise and let it cook, cut side down, for a couple of minutes before I added the toast. I also rubbed the garlic over the pan to get the garlic flavor on the bottom of the pan prior to adding the soaked bread. By the time the french toast was done, the garlic was also a pleasant brown. I served it just on the side (as you can see in the photo below) and T and I just cut and ate pieces with it as we went along. I would even consider roasting the garlic (whole and peeled) with the tomatoes next time. If it gets soft enough, you can just spread it onto the bread. If not, I would just serve it on the side as I did above. 


As you can also see in the picture below, I added onions the second time. When  I put the tomatoes in the oven, I also added 3 full red onion slices, thinly cut (still no added fat), and laid them directly on top of the tomatoes. They softened up nicely and I really liked the way the onion cut the sweetness of the tomatoes.

French toast, take 2!

Some other options: 
- If you just don't need/want/care to remove dairy or reduce fat, the flavor of this dish would likely be enhanced by adding those in. You could make more of a traditional french toast base by using a whole egg and about 1/4 c of milk, and then adding in your savory spices. Then you could cook it in a little bit of olive oil or melted butter. I still don't think you would need the oil on the tomatoes, but that's totally up to you. 

- A drizzle of pesto instead of/in addition to the fresh basil would add a super flavorful punch. Standard pestos usually have olive oil, and some have parmesan and pine nuts, so this would only be FMD friendly in P3.

- Finally, if you're really feeling nutty, I bet a poached or overeasy egg on this dish would ROCK. Although I generally think yolky eggs make everything better...


I hope you enjoy this savory french toast. What's your favorite unusual breakfast dish?


Sunday, August 9, 2015

Garden Meatballs reincarnated


I recently made a big batch of the FMD Garden Meatballs (recipe here). We had them for dinner one night with the tomato sauce and zucchini noodles I posted in that recipe, but by the next day I wanted something a little different. I decided to repurpose the items and mix it up a little bit. For lunch, we had stuffed zucchini boats, and for dinner, stuffed chicken roulade.

Meatballs = gone. Done and done. I find it much easier to follow a healthy diet when I don't let myself get bored. These two alternative uses for the meatballs are healthy, tasty, and definitely not boring!

Garden Meatball- Stuffed Zucchini Boats

Let's start with lunch: Cut two zucchinis in half length-wise and scoop out the seeds as well as a bit of the flesh- just enough to create a nice little zucchini boat. Lightly spray a baking pan with olive oil cooking spray*, lay the boats cut-side down on the sheet, and bake at 375 deg F for approximately 15 minutes. I was looking for both some caramelization on the cut side and for the squash to become tender. When I was able to press a fork through the back of the zucchini as they lay face-down, I decided they were ready to go.


While the boats are a-bakin',  cook about 1/2 a cup of diced onion in a sautee pan with a little bit of olive oil ** (or broth if you're trying to stay low-fat) until they are slightly browned. Add four of those leftover meatballs, chopped up. Cook the mixture until warmed through, adding a bit more salt and pepper.

Now, if you haven't made those yummy meatballs,you can still make this happen***. Instead of just cooking down onion, add in whatever vegetables you have on hand. You can add diced carrots, celery, chopped spinach or kale... hell, maybe even some more zucchini (zucchini inside of zucchini...whoa...). If you decide to add anything more dense, like sweet potato, just make sure you start that thicker veggie first and then add the lighter items so they all end up cooked properly. Add salt and pepper, as well as whatever spice mix you're in the mood for. If you want to go italian, you can add garlic, basil, and oregano. If you're in more of a mexican mood, keep the garlic and then toss in some cumin and coriander. Cook until the veggies are tender and starting to get a bit of caramelization. Taste for seasoning and adjust as you see fit.

Once those veggies are all cooked and happy, add in your ground beef (or turkey, pork, tofu...whatever makes you have on hand). For just the 4 boats, you probably only need about 1/2 pound of meat. But if you're planning on making the roulades, I'm sure you will find a good use for any extra stuffing.

Spoon the filling into the boats and sit them on your baking sheet. Bake them at 375 deg F for about 10-15 minutes. You just want to get everything cooked through and to give the filling a chance to hang out with the zucchini and get all friendly-like.
Once you remove them from the oven, you can customize them. I chose to top mine with some of the leftover tomato sauce from the night before. You could also add some salsa or a nice drizzle of balsamic vinegar or glaze***. Enjoy!!


And behind Door #2: Meatball-stuffed Chicken Roulade

Moving on to dinner....A couple of months back, we had bought a pack of thin-sliced chicken breasts. We ate two and froze the rest. I decided this would be the perfect time to pull them from their icy home. For roulades, these thin breasts are incredibly handy. Pretty much the trickiest part of any stuffed meat dish is getting the inside of that meat cooked. I'm not gonna lie, the first one I made and cut into (my test breast, if you will), was still a little pink where the meat met the stuffing. But I fixed it. And no one got salmonella. Win.

First, preheat your oven to 350 deg F. That done, let's move on to the stuffing- I actually did the exact same thing as I did for the stuffing in the boats, so no additional work is needed here. Just use your leftovers from the boats or follow the instructions above.

Then it's time to prep your chicken. If you dont have the skinny ones lying around, you can easily thin out what you do have. Using a good sharp knife, slice through the middle of the breast length-wise. As you cut through, pull the top half up, slicing until you cut all of the way through and have two approximately equal-sized pieces. Then grab a meat mallet, heavy pan, or whatever heavy non-breakable item is in sight, and pound out the breasts until they are about 1/2 " thick all the way through. Try to make sure one end isn't thicker than the other so you get an even cook. Season both sides with S&P, as well as anything else that might please your taste buds. 

Now, the amount of filling you place inside the chicken will depend on the size of your pieces. You want to be able to roll the sides of the chicken as well as the ends over the stuffing- much like a well-rolled burrito or egg roll. Spoon in the filling, roll up your chicken and close with a toothpick. I ended up making 4 breasts with the same amount of 4-meatball mix I made above, with a little filling left over. 

In a sautee pan (ideally one that can go straight from the stovetop to the oven), heat 2 tbsp of olive oil**. Once the pan has reached medium-high heat, set the rolls in the pan, lightly running the chicken along the pan bottom to ensure that there is a bit of oil down before you place each piece. Once you set them down, don't touch them. Let them do their thing and get brown for a couple of minutes. Then rotate the rolls, repeating the browning for all sides. Once the rolls are completely brown, they may look like they are done and ready to be eaten... 

...But this is a lie. 

There is still a layer of pink lurking inside, threatening to ruin your lovely meal. 

So- if your pan can go straight to the oven, do it- pop that whole thing straight in to your preheated oven for 8-10 minutes. If it can not, take the rolls and place them on a baking sheet. Then pop those babies in the oven, also for 8-10 minutes. When done, remove them and look at them adoringly- then invite anyone else in the house to come look at what you have created. This may just be the dog, but I'm sure he will be suitably impressed.

To serve: I have a balsamic glaze that I LOVE. It goes with so many things and is just so darn yummy. I believe it should be a household staple. So as you can see below, I simply plated the rolls whole with a drizzle of glaze and a vinegary side salad. You could also go spicy with some sriracha, maybe whip up one of the aiolis I posted here, or any other favorite condiments you might have on hand  ***


Important note: If serving whole, either remove the toothpicks ahead of time or be sure to let your guests know that the rolls hold a woody surprise!

So those are two ways that you can repurpose leftover meatballs, extra veggies, ground meat, or any combination thereof. Any other ways you like to use up these types of leftovers? I'd love to hear them!!

FMD Footnotes:

*Cooking spray = a no-no. With these, you could put a bit of broth on the bottom of the pan. Alternately, just lying down a layer of foil should still allow for caramelization without any annoying sticking.

**For FMD, use a bit of your favorite FMD-approved broth. I have mentioned it before, but I'll say it again. Bialetti Aeternum pans are awesome for getting browning without any additional fats... and without just boiling your veggies!

***Just keep your choices limited to phase-appropriate items!


Wednesday, July 22, 2015

Healthy, tasty, oaty pancakes- FMD friendly.

So, as I mentioned recently, a few weeks ago Tyson and I took a trip to Boston. When we left, we had a list of restaurants and bars we wanted to try... you know, if we had the time. We ended up visiting 25 places in 5 1/2 days. 25. Needless to say, we came back a little...stuffed. As a result, we decided to go on a strict diet. When it comes to diets, we both thrive in programs that give you rules- specifically, rules that make sense and don't provide a lot of grey areas into which we can fit things like ice cream... After some research, we decided to try the Fast Metabolism Diet (FMD). 2 1/2 weeks in, we are both having really great results. However, I have found that I have to work to make things a bit more tasty- the recipes are satisfying physically, but mentally they leave a little something to be desired.

To give the basic rules in a nutshell: Overall, no white stuff- you know, refined flour, sugar, etc. Also no dairy. On Monday and Tuesday (Phase 1), we are able to eat healthy carbs like brown rice, sprouted grain bread, fruit, etc- but remain low fat. Wednesday and Thursday (aka the dreaded Phase 2) are the low-carb, high-protein, low-fat days. Friday-Sunday (Phase 3) are the happy days because you can add back in healthy fats like olive oil, almonds, and avocado. Plus you get fruit back, quinoa... it all feels so luxurious and naughty after that unpleasant Phase 2. 

Having said all of that- I have been looking for ways to create meals that fit within these guidelines and fulfill my psychological needs for satisfying foods. I will likely be posting a number of these experimental recipes over the next few weeks as we continue to try to alter our way of eating....and pants sizes. Some of them will be cited as coming from the FMD book, blog, or website- I am finding that the general guidelines for these recipes is great, but there are technical things that can be done that make the flavor so much better. Some of these are as simple as using the right pan or amping the basic recipe up with some bold spices. 

Let's get started! Today I present....Oat Pancakes with sugar-free berry compote

*This recipe would be FMD Phase 1 friendly, and could be Phase 3 friendly by switching the rice milk to almond milk.


This recipe is gluten-, soy-, dairy-, AND sugar-free. That's right- I have taken all  of the fun out of these pancakes...and they're still good! I will say that the first bite was a bit of a surprise- they do taste kind of like oatmeal. They won't be the fluffy, light pancakes you're used to, but I liked them and Tyson didn't complain...

Makes approx 12 3" pancakes, I did 3 pancakes per serving for a total of 4 servings.

Pancake Ingredients:

1 1/2 cups oats (I used rolled oats- please see the *Note below for info regarding steel-cut oats)
1/2 tsp. baking powder
1/4 tsp. himalayan sea salt (if possible- other salts would work just fine)
1/2 tsp of your seasoning(s) of choice. I really like pumpkin pie spice because it has all of the good stuff. Cinnamon would be great as well, some nutmeg, whatever strikes your fancy. 
2 egg whites (6 tbsp if you get the cartons of egg whites alone)
1 cup rice milk- you can also use any dairy or non-dairy product of your choice. If you are good with dairy (and some fat), I am betting buttermilk would make these super fluffy and lighter than they would be otherwise. 
1/2 tsp pure vanilla extract

First, you're going to feel like a cooking guru when you make flour. Put the 1 1/2 cups of oats into a food processor or strong blender. Press start. Watch as you create flour. Bam. That just happened.

*Oat Note: I have tried making these with steel-cut oats as well. Unless you have an industrial food processor, it was much more difficult to turn these into a fine flour. I ended up passing the flour through a sieve to get the larger chunks out:

Processed steel-cut oats

Sieved steel-cut flour
The remaining oat bits.


Also, the flour really soaked up all of my moisture as the batter sat. I ended up adding a splash more of the rice milk to thin the batter back out.

Once you have settled on a flour and made it like a cooking ninja, mix all of your dry ingredients in a large bowl. Mix the wet ingredients together in a smaller bowl. Whisk the wet ingredients to get the egg whites a little fluffy. The oat flour will be a bit dense, any extra air you can get in the whites will help fluff them up a bit. Pour the wet ingredients into the bowl of dry ingredients, mixing just until the dry ingredients are incorporated. 

Spritz a little non-stick spray onto your pan and heat it to about medium heat*. Ladle a scoop of batter in to make an approximately 3" diameter pancake. Or make it bigger. This is your party. But keep in mind you're gonna have to flip this beast at some point...

When you see bubbles forming on the surface, slide your spatula underneath to see if it looks like the cake is going to come with you willingly. If it feels a little wobbly, let it sit a little longer. This shouldn't take too long, but keep in mind that these pancakes are a bit more dense than your standard cake, so it will be a bit longer than usual. Flip the pancakes when ready- at this point, they should only need a few more minutes once they are flipped. 

Now for the topping... **
As I mentioned, the basic recipe for this stuff is sugar-free. That means that the sweetness comes from your fruit. If your fruit is tart, then this sauce is going to be a bit tart. So let's talk about your options if you want to sweeten it up. If you are looking for a natural no-sugar option, honey would be great and agave would also work. If you want a no-calorie sweetener, stevia, truvia, and xylitol would all also work (The latter would be the FMD options). 

The basic recipe for any compote is so simple, it's crazy. The amounts below should be sufficient for the amount of pancakes in the recipe above:

Compote: 
2 cups berries- or whatever fruit you like. I added apricots in my last batch just because they were getting soft. Your fruit can also be fresh or frozen.
If fresh- add about 1/4 cup of water. If frozen, the ice on the fruit should melt as it cooks- this will do the same job. 
~1 tbsp lemon juice...you can add a tsp of zest too if you're feeling fancy. 

Toss all of this into a pan, cook over medium heat. Also, this is when you should add any spices you might like. To stick with healthier items, I like to add some spices like cinnamon and nutmeg, and maybe even a splash of vanilla.  If you are ok with sugar, you can use any of the options I mentioned above. I would start with 1 tbsp of honey, 1 tbsp of agave, or 1/2 tbsp sugar (or the sugar-substitue equivalent).

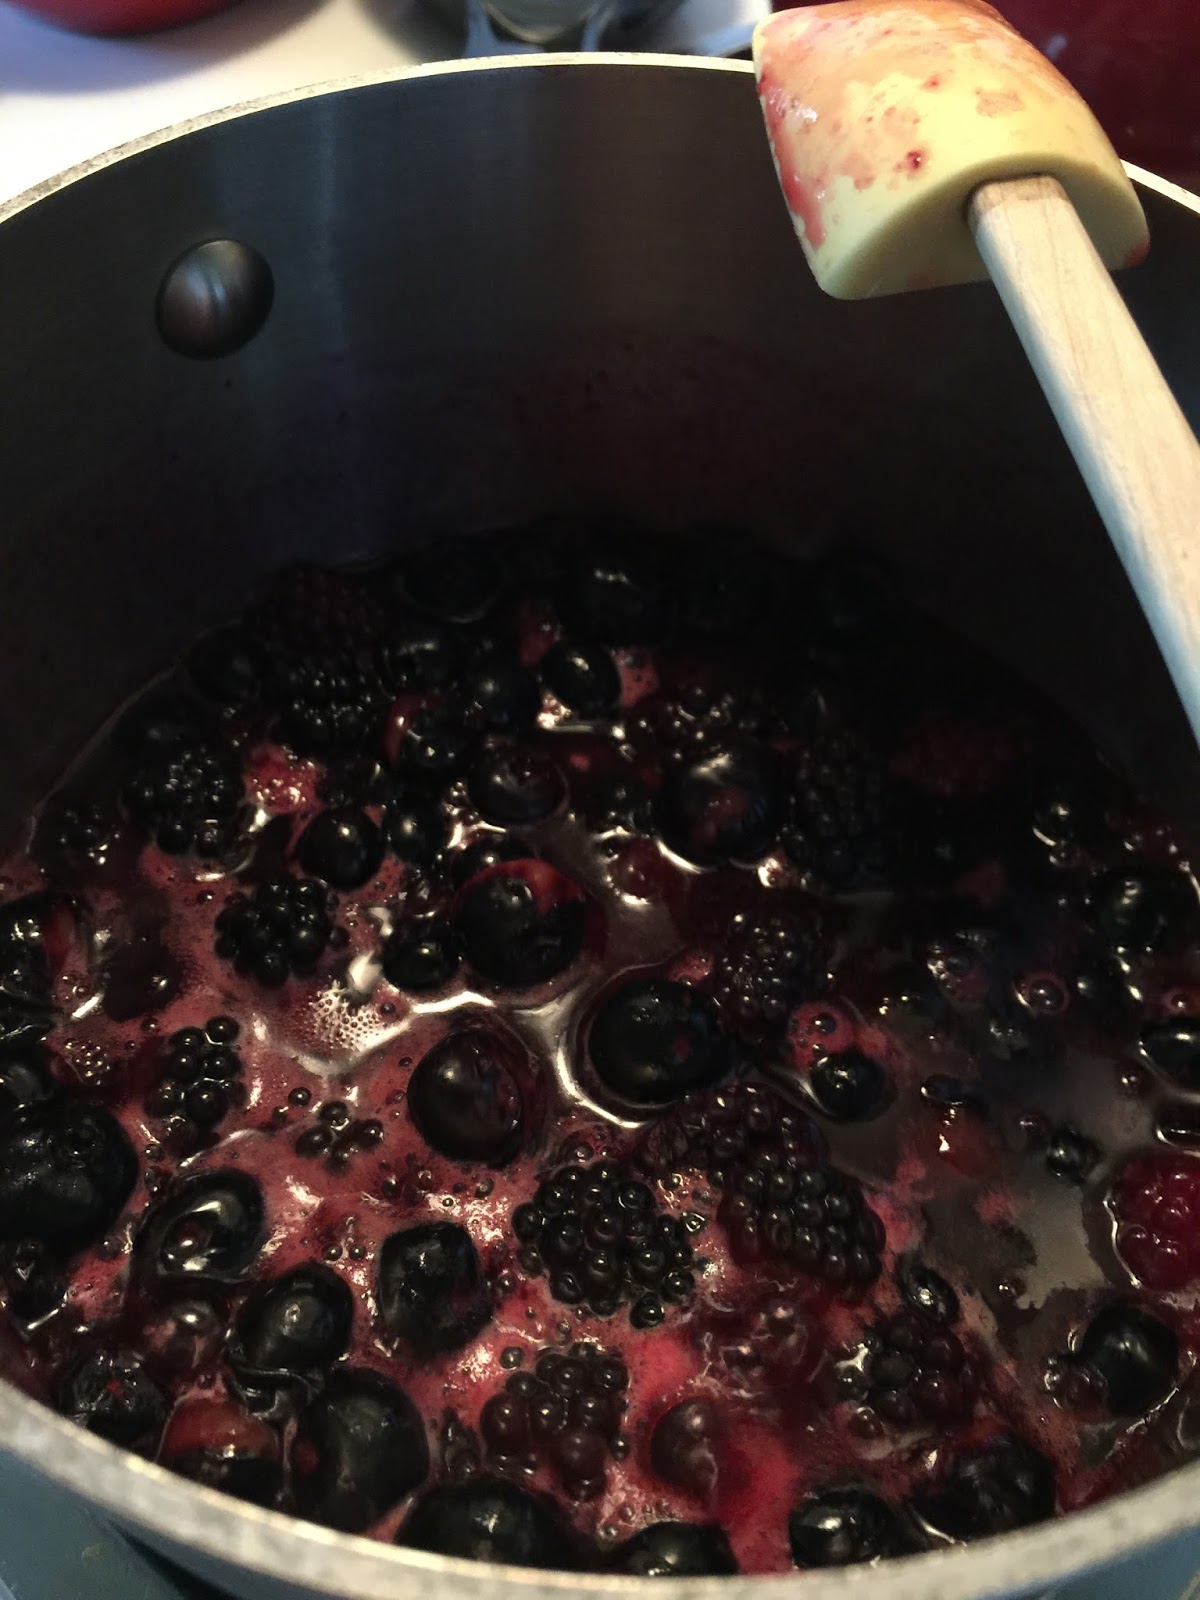
Then you just let it all hang out and break down into a beautiful sauce. Don't be afraid to let this just go for as little as 10 and up to 20  minutes or so, stirring occasionally to make sure it doesn't stick to the bottom. The longer it cooks, the thicker it gets.

Berries are starting to break down
Complete compote- thick and rich


Once it has cooked down to your desired thickness, taste it do decide if you want to add more of your chosen sweetener or spices.

Now, the only thing left to do is plate it up, make it pretty, and enjoy!

I was feeling whimsical the last time I made these... you know those little drips you sometimes get when you make pancakes? I decided to go ahead and flip them over to create a handful of mini pancakes. Then I really got fancy with it:

Amuse bouche? Hamster breakfast? Exercise in perspective? Or just someone who watches way too much Food Network...?

Fortunately, Tyson also got his normal-sized plate....

Actual Human-sized portion 

FMD Footnotes:
* Cooking spray is a no-no on all phases. As long as you use a standard non-stick pan and don't set the heat too high, these should cook up just fine. I would not recommend these in a non non-stick pan... Also, if you are using a non-stick pan and you notice them starting to stick, that means your heat is too high. Reduce the heat and remove the pan from the burner for a minute while things cool down. The pan should release it's pancake hostage and allow you to continue cooking. 

** I have been informed that you are not allowed to cook fruit on FMD, only warm it...so you won't get the broken-down compote that I have here. I would suggest slightly mashing your berries with a fork or potato masher and then cooking slowly until warm!


Wednesday, April 24, 2013

Easy, Healthy, Green Veggie Curry


I have never actually made a curry before, so I was pretty nervous when I decided to try this. But I have been seeing green curry paste at the store for a while and I decided to make it happen. I went with a fish-sauce free curry paste, so this is completely vegetarian- and actually even fully vegan. Some day soon I will make my own curry paste- I have seen recipes on the interwebs and I think I can piece together one that I like. But it requires many ingredients, and on the day that I made this, I was physically and mentally drained- thus I did not have the capacity to think about the 50 ingredients it would require....

I went with green as it has a more mild flavor than red and I wasn't sure how spicy the paste would be. This one ended up being flavorful with a nice kick, but nothing too extreme. If it isn't spicy enough for you, you may want to toss in some red pepper flakes at the end.

 So- onto the curry...

Ingredients
2 large yams (or some type of combination thereof) approx 1 lb
1/2-3/4 of a red bell pepper
1 large or 2 medium carrots
1 medium onion
2 cloves garlic
3 tbsp green curry paste
1 13.5 oz coconut milk (I used light coconut milk and it was still great, regular will just make a richer broth)
1/2 c veggie stock
Peas- I had to use frozen, but fresh would be much better
Green onions, for garnish


The basic idea is to add whatever veggies you find tasty- I like potatoes with curry, I feel the white potatoes soak up all of the curry flavor, and yams add a nice sweetness to a somewhat spicy curry. So I did all of that. I used 3-4 baby white potatoes I had lying around, one beautiful Japanese yam, and one garnet yam. The Japanese yams are milder than your usual sweet potato, so it was in all a nice contrast across the 3.


Chop the potatoes into half-moon chunks and put them in a pot- cover with water, add a bunch of salt, and bring to a boil. Boil until mostly cooked through, 5-7 mins. 

While that is happening,  chop the  carrots, onions, and bell peppers into nice bite-sized pieces- roughly uniform so they cook at the same pace.Mince the garlic and toss it in the bowl.


Heat 1 tsp coconut oil- yes, coconut oil. I raved about this stuff in my stir-fry post and I'll do it again here. There is no better oil for a stir-fry (well.... toasted sesame oil is pretty darn close...) and it is very good for you.
Anywho- heat the oil in your wok, getting the pan and oil nice and hot. Toss in the carrots, peppers, and onions, add a liberal dose of salt, and cook them until mostly cooked through and they start to smell reeeeeaaaaaaaalllllly good.Don't be afraid of the heat here, especially if you are using a wok. Unless things start to brown too quickly, the rapid heat of the wok is your friend...


Once they're mostly cooked through, add the curry paste- I did it in 1/2 tsp chunks across the mixture and used about 3 tbsp. More= spicier. Also, if you don't like the flavor level when you're done, you can a)mix some curry paste with a bit of veggie broth and stir that into your pot while reducing the broth down to concentrate the flavors or b) add more veggie broth and/or coconut milk if you want to reduce the amount of curry flavor... or even water if you really want to tone things down.


Drain the potatoes when they are done and toss them into the mix in the wok. Add the veggie broth, coconut milk, and whatever peas you are adding, and gently stir. The broth and milk will mix with the curry and turn everything a beautiful creamy green color. Let it all hang out and get all cozy with the flavors for 5-10 mins at around a simmer, making sure it doesn't start to stick to the bottom. As it reduces, taste for salt and add as needed. 

I have a photo for this part but the computer refuses to upload it for reasons unknown to me. Visualize it here:


Serve over brown rice or quinoa. I chose quinoa and it was fantastic. Garnish with fresh green onion and perhaps a squirt of lime juice- light, tasty, spicy, and supremely satisfying.


Black Bean Soup

I found this rich and flavorful black bean soup here. I just about doubled the spices- you will likely want to adjust based on personal tastes. Black beans are full of protein and fiber.While this soup may *taste* decadent (especially if you blend it up), it's pretty much guilt-free.

EVOO (about a tbsp or so)
4 large cloves garlic, minced
2 large-ish carrots, or 3 smaller carrots
2 ribs celery
1 medium onion
2 15oz cans black beans, rinsed and drained
1 3.5oz can green diced chiles
4 cups low-sodium beef broth (you can easily use a rich veggie broth here to make it vegetarian)
S&P
1 teaspoon chili powder
3/4 teaspoon cumin
1 teaspooon dry oregano leaves
1 bay leaf


Pour a round on EVOO into your stockpot. Add carrots, celery, onion, and garlic and saute 4-5 minutes until onions are soft and the veggies start to brown.


Add in the beans, chiles, broth, and spices. Simmer for 20-25 minutes until carrots are soft, remove the bay leaf. 


Before


After

I would have liked to keep the soup as-is, but with my soft food requirement, I had to blend it up. It was very tasty blended as well, so you could really go either way. I blended it into a smooth puree in batches using my trusty blender. Make sure if you do this that you leave the top loose to allow steam to escape so the blender doesn't blow up on you. That would really ruin the soup. 

The original site recommended several toppings such as crushed tortilla chips, cheese, etc. It also added lime at the end. I preferred adding a squeeze of lime juice to each individual serving and  topping each serving with a dollop of sour cream or unsweetened fat free greek yogurt- sometimes with a bit of chopped cilantro. I think this recipe would be great in the summer as well- maybe paired with a little avocado or mango salsa....
 
Not my best photo- I was reallllly in a hurry to start eating this....

Sunday, April 14, 2013

Quinoa "Fried Rice"

I have been craving fried rice, but I quickly dismissed it, thinking it was just too carb-heavy. Even if I were to use healthy brown rice, it would just feel like too big an indulgence. Theeeeennnn I thought, "Hey, Self- what if we were to use quinoa instead of rice? It's chock full of protein and it's not even officially a grain."  I made a quick trip to the Google machine and it turns out I was not the first one to have this flash of brilliance. Whatever. I don't need that kind of press anyway. 

I had some sesame tofu from the ready-prep area of Whole Foods. I'm not a tofu fan, but if you're there when they have this stuff, try it. (I'm going to try to re-create it  soon, so stay posted.) I decided to use that as my "meat". Other than that, my plan was to use a ton of veggies and a combo of egg and egg whites. This whole process took maybe 20 mins because I had a bowl of leftover plain quinoa already cooked. But cooking quinoa only takes about 12-14 mins, so even if you have to do that first, this is a ~30 minute filling and satisfying recipe. 

The amounts I have below are what I used to make this giant bowl. I planned to eat all of it, but was pretty full after half, so I'll say it's good for 2 people or 1 really hungry person. It would also be good with the Asian Cucumber Salad recipe I posted under the Stir Fry recipe here. I chose the veggies because, well, they were what was in my fridge. Get creative and put in whatever you like. Bell peppers not your thing? Toss in some broccoli! It's your fake fried rice, do what you want!


What I used:
- 1 cup cooked quinoa (1/2 c dry)
- 1 tbsp toasted sesame oil, divided in half (SO much better than reg sesame oil. You need this in your home)
- Ginger- I have the jarred ginger, but fresh would be better if you have it on hand
- 1 large carrot
- 1/2 red bell pepper
- 1/2 medium zucchini
- 3 stalks of ramps (they're in season right now, got some great fresh ones at the farmers' market...)
- 1 egg + 3 tbsp egg whites (equivalent of one egg)
- ~ 1/3- 1/2 cup frozen peas, defrosted (fresh peas would be great if you can get 'em)
- One 8 oz container sesame tofu
- Bragg's liquid amino
- about a tsp of teriyaki sauce (I could  take or leave this addition... up to you)
- toasted sesame seeds and scallions for garnish


I wanted everything to cook evenly and I didn't want huge chunks in the quinoa- I was going for a more uniform dish. So I put the carrot, bell pepper, and zucchini in the food processor and gave it a good rough chop- not so much that it was in little bits, more like bite-sized. I did the carrot first by itself, then the zucchini and bell pepper together.

Scramble the egg and the egg white together and chop the ramp, using both the white and the green parts.


Heat your wok on a fairly high heat and added 1/2 tbsp of sesame oil. Here is a good time to mention that a good wok is a smart investment and can and will be used more than enough to justify the purchase :)

Once it gets good and hot, add in the bowl of veggies ( but not the peas). Cook, stirring occasionally, until tender but still crisp, about 5 mins. Add the quinoa and pour the Bragg's 2-3 rounds around the pan- about 1-2 tbsp. Also add the other 1/2 tbsp of sesame oil and the teriyaki sauce (if using). You could also potentially use fish sauce here instead- if you're into that kind of thing.

Create a well in the middle of the quinoa and add the egg. Stir constantly until curds start to form. Mix the egg into the rest of the concoction until cooked through. Toss in the peas and add more Bragg's to taste. At this point, you will also want to test for salt. If the flavors don't pop, add salt. It doesn't only make things taste "salty", it accentuates the flavors that already exist...

At this point, I added in my tofu. If you were using any other type of protein that needed cooking, I would suggest using a tad more oil and cooking that just about all the way before adding  the veggies. You may also want to marinade your protein prior to cooking to develop the best possible flavor. Then follow the recipe as-is.

Final step: Plate it up and try not to burn your mouth as you shovel it all in. AND feel no guilt... the recipe above has about 590 cals if you eat the entire thing, plus it's chock full of clean, highly nutritious foods. You can also save a few cals if you take out the whole egg and use egg whites only.  Enjoy!!


Sunday, March 3, 2013

Eggs in Purgatory

I love eggs.
Seriously, I love eggs in all forms- poached, fried, scrambled, hard-boiled, whites only, all of it.
I especially love an egg with a runny yolk that comes pouring out like some magnificent rich creamy sauce. The eggs in that recipe totally do that. And it's super fast and easy. And it rocks.

Ingredients:
-Diced tomatoes- for a full meal (I usually have this for dinner), I will make this for myself with 3 eggs, and I use about 1/3 can of tomatoes.
-Fresh basil, chopped- if you have a can of those awesome tomatoes with basil and garlic already added, just do that. Or even add more basil. If you're into  that kind of thing (I am).
-A clove of garlic, minced (not necessary if already in tomatoes, but you can always add more. You can also just use some garlic powder if you want.)
- Eggs
-Polenta, about 1/3 c dry/person
-Maybe some melty cheese such as fontina for the polenta
-Some fresh grated parm

Ok-if you're using fresh garlic, put just a bit of EVOO in your saute pan and let the garlic cook for a minute. Add the tomatoes and basil or whatever seasonings you're feeling that day. Add some salt and pepper and let everything just hang out and get friendly on low heat for a bit.


While that's happening, get a pan going with water for the polenta. You want a 4:1 water to polenta ratio. I use Bob's Red Mill polenta which says it is the slow cook kind, but it always cooks in about 3 minutes. I would make sure you know which kind you have before you get started or you will have very cold eggs....

Bring the water to a boil. Once it starts to boil, you will whisk in the polenta and lower the heat to a simmer. It will start to thicken very quickly and probably be done in about 3 minutes. Turn off the heat, and this is when you can toss in a handful of cheese if you're feeling frisky. I like fontina here, but do whatever you want.Go crazy.

Once you have the polenta in the pan, make some little indents in your sauce and crack the eggs into your pan. Toss some S&P on top of the eggs. Cover the pan and let them cook over medium heat for about 3-4 minutes. You want the yolks runny and the whites firm. Covering the pan allows the steam to cook the tops of the eggs.


Once the whites are cooked through, slide the eggs and sauce on top of the polenta.


Top with a sprinkle of fresh grated parm and enjoy. It's hearty and flavorful, and the gooey yolk feels like you're eating a creamy cheese sauce- you don't have to remind yourself that you're actually eating healthy.

**If you're in a rush, this whole thing can be made even faster- cook the eggs separately either sunny side up or over easy while you're making the 3 minute polenta. Use the basil and garlic canned tomatoes, warm them up in a pan or in the microwave. Plate the polenta, top with tomatoes, and slide the eggs on top. Add some parm and bam- dinner. You just crushed it.