Wednesday, August 26, 2015

Amazing rich mushroom gravy- no flour, no fat added!

I put together this tasty little gem after we tired of grilling lean turkey burgers and we realllly wanted some sauce for the amazing brown rice pasta I just found on Amazon. I was scared of pasta alternatives because I had tried a couple here and there and they just made me sad. But the reviews for this stuff were amazing, so I said what the hell. This is what it looks like and you can read the reviews for yourself here:


You know how everyone says that a lot of rare meats taste "just like chicken"? Well, I have to say- this stuff actually tastes just like regular pasta. You have to be careful with the cooking time, though. I cooked it for about 9 minutes, although it suggested 11-13 minutes. I just kept tasting to check for the right texture- which happened to be right around the 9 minute mark. I drained it and actually chose to rinse it in cold water. This is *not* something I would usually do with regular pasta, because the starch is great for catching and holding on to sauce. But in this case, reviews had said it could get mushy, and I really wanted to make sure it stopped cooking. So I gave it a quick rinse with a shot of cold water, and it turned out perfect. There was no odd flavor or aftertaste, and the texture was just what you would expect from a normal wheat-based pasta.

Ok, now that I got to get in my excitement about my new pasta, let's talk gravy. 


Mushroom Gravy: Ingredients

~8 ounces baby bella mushrooms, sliced
- 1/2 large onion, diced
- 4 cups broth- I used beef here and loved the meaty beef and mushroom combo, but you could also switch up the flavors and use chicken or veggie broth. 
- Rosemary- fresh or dried,to taste. I used ~ 1/2 tbsp
- Salt and pepper to taste
- Arrowroot or cornstarch

You need to start by browning the onions and mushrooms. Depending on your diet restrictions, you can a) use a bit of olive oil, b) spray the pan with some cooking spray, or c) cook the onions and mushrooms by putting a bit of broth in the pan at the beginning to keep everything from sticking. 

In the photos here, I used a shot of cooking spray, no additional oil or fat was added. I also used my magical Bialetti ceramic pan.... 

Once you have decided on your method, add that plus the mushrooms, onions, and a healthy dose of salt and pepper. Cook the onions and mushrooms over medium heat until they brown- you may even see some of the browned bits start to stick to the bottom of the pan. You want to take this opportunity to develop some serious flavor. The browning will make the veggies caramelize- the natural sugars in the onions will make them taste sweet, and the mushrooms will develop a savory meaty flavor. 

Once the onions and mushrooms are nicely browned, pour in 3 1/2 cups of broth, reserving the other 1/2 cup for later. Add in the rosemary. If you're using fresh rosemary, remove the leaves from the stem and give it a nice chop. If you're using dry, I would also suggest either chopping the rosemary or using a mortar/pestle to grind it down a bit. This is also personal taste- I just don't like chewing larger pieces of dried rosemary.... but I love the flavor. I used a mortar and pestle and just ground it down until it was mostly powder. 

Bring the sauce to a boil. Then turn it down to medium-low heat and let it cook.....


And cook....

Until it reduces by about 1/4 (approximately 15-20 minutes):


At this point, you could eat it as-is and it would be super tasty, but not very thick. You could continue to reduce it, but by further condensing the flavors, you might end up with an overly salty sauce. The other option is to use arrowroot or cornstarch, which is what I did here. The final 1/2 cup of broth was set aside for this purpose- use that to make a slurry with the cornstarch or arrowroot. The broth should be at least room temperature, if not cool, to be the most effective. Stir this mixture right at the end- if you continue cooking at a medium heat or bring the sauce to a boil after adding it, it may reduce the effectiveness of the thickener. 

Mix in enough of the slurry to get the consistency you want. Since you are using broth instead of water, it shouldn't water down your mixture- but may want to taste to see if any additional seasonings should be added prior to serving.

And voila! That's it! No added fat or flour and you can have rich, creamy myshroom gravy. T was craving salisbury steak (which neither of us has had in years), so we grilled some seasoned burger patties and then smothered that and the awesome brown rice pasta with the sauce. He dubbed it "the best salisbury steak he's ever had." Not sure what I'm being compared to, since most salisbury steaks come in frozen dinners...but I'll take it ;)


Tuesday, August 18, 2015

Savory french toast with tomatoes and basil


Yum. Yumyumyumyumyumyumyum.

I have been struggling with coming up with some healthy breakfasts that fit into an Fast Metabolism Diet (FMD) Phase 1 box...For those of you unfamiliar, it requires a whole grain (often in the form of oats or sprouted grain bread in this phase) and a fruit, and most vegetables are allowed. However, there are to be no added fats. So egg yolks are out, as is olive oil. A lot of people rely on oat-based meals (for example, the pancakes here). But I can only eat so many oats and I was aching for something new. The FMD book has a recipe for egg-white french toast with strawberries that became my inspiration for this recipe- that combined with a heaping bowl of red and yellow cherry tomatoes from the garden and a beautiful pot of basil outside my front door.   

For anyone not working within the FMD restrictions, this is still a dairy-free, no-added-fat recipe. You can even make it with gluten-free bread if your diet calls for reduced gluten. I used a sprouted spelt bread that we actually found at a local farmers' market over the weekend. On a sad note, I forgot to store the non-preservative-laced bread properly and it went bad after 4 days. Learn from my mistakes, people. 

Here are the ingredients you will need for 2 servings of the healthy version (See the notes that follow at the end regarding variations that could be made):

2 slices of sprouted grain bread
Approximately 1 cup of cherry or grape tomatoes
2 egg whites
Salt (ideally Himalayan sea salt)
Ground pepper
Chopped fresh basil
Optional:*(see note at bottom) 
Sliced onion
2 cloves of garlic, peeled
other seasonings such as garlic or onion powder, cayenne or red pepper flakes, etc...


Let's start by talking about the tomatoes. So what I have in the picture below are my "dueling tomatoes." Since this phase calls for no added fat, and cutting down on fats (but not cutting out!) isn't a horrible idea in general, I wondered what would happen if I roasted tomatoes just by themselves, in a non-stick pan, naked-style. The pan on the left has tomatoes that have been sprayed with olive oil, and the right side is nekked. Both have a light dusting of sea salt. I roasted them side by side in a 400 deg F oven.

Dueling tomatoes
After about 15 minutes, the tomatoes on the right, the non-fat tomatoes, looked like this:


Zero fat added
Aren't those awesome?? All caramelized and sweet and juicy.... I didn't end up taking a picture of the other pan, unfortunately, but they looked basically the same. Verdict: oil or any additional fat = unnecessary for roasting tomatoes. The juices they release during the cooking process are sufficient for making really tasty tomatoes. Sweet.


I'm glad we have that all figured out. So while your fat-free tomatoes are getting all sweet and gooey in the oven, you can prep the bread. For each slice, make a mixture of egg white (1 egg white or 3 tbsp of cartoned egg whites), salt, and pepper. This is also where you can also add any other seasonings that you think might taste good. Just remember that they should go along with the roasted tomatoes, so nothing that would add any additional sweetness. Use a whisk to combine the spices and the egg white, getting the white a little frothy. Place the bread in the mixture and let it sit a bit before flipping, allowing the egg white to soak in. This will depend on the type of bread you're using. If it is a long piece from a bread loaf (like the one below), I would suggest slicing it in half to provide more soaking surface. If it's a thinner piece, like Ezekiel bread, if you let it soak too long it will just fall apart- so just use your best judgment. Warm your non-stick pan over medium heat and then add the soaked bread. Let it cook for about 2-3 minutes per side, allowing each side to get a crispy brown. 


Browning the toast
Now here comes my favorite part: putting it all together.

First- the toast. Then the tomatoes, pressed down slightly with a fork to open them up and get them to stay put. Then the freshly chopped basil, finish with a touch of salt and fresh ground pepper to taste. 

At this point, you could eat it as-is and be super happy. Or this could also be the time for you to add any customizations you might want to experiment with. In the photo below, I added a drizzle of balsamic glaze (which I would argue should be a staple condiment in any home).
French toast  #1

*I mentioned some optional items...

...Let's talk about those: The second time I made this, I decided it needed a hit of garlic. I didn't think about it in time to toss the garlic in with the tomatoes, so I sliced the garlic in half lengthwise and let it cook, cut side down, for a couple of minutes before I added the toast. I also rubbed the garlic over the pan to get the garlic flavor on the bottom of the pan prior to adding the soaked bread. By the time the french toast was done, the garlic was also a pleasant brown. I served it just on the side (as you can see in the photo below) and T and I just cut and ate pieces with it as we went along. I would even consider roasting the garlic (whole and peeled) with the tomatoes next time. If it gets soft enough, you can just spread it onto the bread. If not, I would just serve it on the side as I did above. 


As you can also see in the picture below, I added onions the second time. When  I put the tomatoes in the oven, I also added 3 full red onion slices, thinly cut (still no added fat), and laid them directly on top of the tomatoes. They softened up nicely and I really liked the way the onion cut the sweetness of the tomatoes.

French toast, take 2!

Some other options: 
- If you just don't need/want/care to remove dairy or reduce fat, the flavor of this dish would likely be enhanced by adding those in. You could make more of a traditional french toast base by using a whole egg and about 1/4 c of milk, and then adding in your savory spices. Then you could cook it in a little bit of olive oil or melted butter. I still don't think you would need the oil on the tomatoes, but that's totally up to you. 

- A drizzle of pesto instead of/in addition to the fresh basil would add a super flavorful punch. Standard pestos usually have olive oil, and some have parmesan and pine nuts, so this would only be FMD friendly in P3.

- Finally, if you're really feeling nutty, I bet a poached or overeasy egg on this dish would ROCK. Although I generally think yolky eggs make everything better...


I hope you enjoy this savory french toast. What's your favorite unusual breakfast dish?


Tuesday, August 11, 2015

Summer Simplicity


A Happy Heirloom


When I first started this blog, I thought I could only really post fancy, complex, full dishes. As I have progressed and learned more about the kind of blog I really wanted to write, I have come to realize that things don't need to be elaborate or fancy to be blog-worthy. And as I look through some of the pictures I have taken of super simple dishes, I thought, "Hey, these deserve their moment in the spotlight, too!" I mean come on, just *look* at that tomato. What fancy thing could I possibly do to it that would make it taste better than it does straight off the vine? 

So this post is a brief celebration of seasonal simplicity- a few of my favorite things that can be created in a matter of minutes, but can make you do the happy delicious dance just as much as something that takes an hour. 
*You may also note that these items are pretty tomato-heavy. We went a little crazy with the tomato plants this year, but in the best way. We have heirlooms, red grape tomatoes, yellow cherries, lemon boys, and san marzanos. I add a handful of tomatoes to nearly every meal and no, we are actually not tired of them yet ;)

Tomatoes, jalapenos, lodi apples, and fresh mint- quite the backyard bounty!

When I pick a giant bowl of these gorgeous tomatoes, I can't imagine doing anything that would take away from their natural sweetness and acidity. A majority of the time, I just chop up a combination of what is on hand. The heirlooms are fruity, as are the yellow cherries- although the cherries have a hint more acidity, and  the red grapes are bright with a great crispy bite to their skins. 


So let's go through some of my favorite options. In putting together this post, I ended up with 3 tomato items and one blueberry thing. All take about 5 minutes and make you feel like summertime. (Yes, you can feel like summertime). 

How gorgeous are these?

Let's start with the simplest.
- Tomatoes. Slice.  Salt. I prefer maldon or other flaky salt if you have it. The crunch of the flakes is so satisfying and the pop of salt with the crisp tomato skin is the perfect combo.
- Good bread. This was a fresh farmer's market rye. We were feeling fancy that day so we used Kerrygold butter. Mmmmm. 
And that's it. Fresh in-season tomatoes, salt, bread, butter.

The simplest

Just a hair more complex
- Fresh ground pepper
- Chopped fresh basil
- a drizzle of good olive oil. Like the kind you want to dip bread in... or just dip your finger in. It should be clean and fruity, or maybe even a little spicy. You can go crazy with some infused oils here if you want a little something extra (see what I use on the eggs below)

That's it. I serve this alongside eggs for breakfast, or even just on their own with some fresh toast and creamy butter. It also goes with pretty much anything you could think of for second breakfast, elevensies, lunch, dinner, or fourth meal. 
  

Still pretty simple

Moving it up just a notch
This one involves actual heat and cooking, so it is technically a bit more "difficult". Tyson isn't the biggest fan of scrambled eggs (even though I rock a soft scramble), so I make him his requested over-medium egg. The egg is seasoned with sea salt and fresh black pepper, and laid over a piece of toast (that same awesome rye, in this case). 

I mentioned infused oils above. This particular morning, I drizzled the bread with a Wild Dill olive oil that I got from Seasons here in Bethlehem, PA. I was so pleasantly surprised (as was Tyson) by the incredible level of dill flavor. That, plus the tomatoes tossed with salt, pepper, and a standard fruity olive oil made for a full-on-punch-you-in-the-face-with-summer breakfast. 


Then I did the same thing for myself, but with a soft scramble instead of an over-easy egg. I wish I had had some chives or green onions on hand, but man...even without, this breakfast was rockin'. I would eat this all day, e'ry day. 


And one non-tomato item:
Ok here it is: Summer as represented by blueberries. What does it involve?

-Toast. We love Ezekiel bread. It is so hearty and nutty, and makes you feel full and satisfied.
- Nut butter. This was an all-natural peanut, but almond or any other nut butter would be equally lovely.
- BLUEBERRIES. We live 5 minutes from a pick-your-own berry farm.  If you have yet to experience a fresh-picked blueberry, STOP  YOUR LIFE. Whatever you have going on, just put it on hold. Go find blueberries. And no, not the pint at the local grocery store. They won't give you what you need. You may not even know you need this, but trust me- you do. Fresh blueberries are an entirely different experience from what you get in a store. It's like each fat little berry is its own full fruit-yeah, I know that sounds silly, but try one and then tell me I'm wrong. 

....Where was I? Right. Blueberries. Fresh ones. Pop them on top. 
-Final touch- local honey. Drizzle that goodness over the top like a sweet icing on a toaster pastry. We initially started purchasing local honey because a) we like supporting local merchants and b)they cure allergies!

Ok, so it turns out the second reason is not actually supported by science. But we still like supporting local merchants and our honey lady has cool chickens we get to see when we go by her farm, so we're gonna keep doing that. 


Well, these are a few of my favorite summertime preparations- they're nothing fancy, they just focus on really beautiful summer items and respecting the natural flavors of those items. I hope you try and enjoy them. I'll keep collecting some of these favorites and I'm sure I'll be back with more before the summer is out!


Sunday, August 9, 2015

Garden Meatballs reincarnated


I recently made a big batch of the FMD Garden Meatballs (recipe here). We had them for dinner one night with the tomato sauce and zucchini noodles I posted in that recipe, but by the next day I wanted something a little different. I decided to repurpose the items and mix it up a little bit. For lunch, we had stuffed zucchini boats, and for dinner, stuffed chicken roulade.

Meatballs = gone. Done and done. I find it much easier to follow a healthy diet when I don't let myself get bored. These two alternative uses for the meatballs are healthy, tasty, and definitely not boring!

Garden Meatball- Stuffed Zucchini Boats

Let's start with lunch: Cut two zucchinis in half length-wise and scoop out the seeds as well as a bit of the flesh- just enough to create a nice little zucchini boat. Lightly spray a baking pan with olive oil cooking spray*, lay the boats cut-side down on the sheet, and bake at 375 deg F for approximately 15 minutes. I was looking for both some caramelization on the cut side and for the squash to become tender. When I was able to press a fork through the back of the zucchini as they lay face-down, I decided they were ready to go.


While the boats are a-bakin',  cook about 1/2 a cup of diced onion in a sautee pan with a little bit of olive oil ** (or broth if you're trying to stay low-fat) until they are slightly browned. Add four of those leftover meatballs, chopped up. Cook the mixture until warmed through, adding a bit more salt and pepper.

Now, if you haven't made those yummy meatballs,you can still make this happen***. Instead of just cooking down onion, add in whatever vegetables you have on hand. You can add diced carrots, celery, chopped spinach or kale... hell, maybe even some more zucchini (zucchini inside of zucchini...whoa...). If you decide to add anything more dense, like sweet potato, just make sure you start that thicker veggie first and then add the lighter items so they all end up cooked properly. Add salt and pepper, as well as whatever spice mix you're in the mood for. If you want to go italian, you can add garlic, basil, and oregano. If you're in more of a mexican mood, keep the garlic and then toss in some cumin and coriander. Cook until the veggies are tender and starting to get a bit of caramelization. Taste for seasoning and adjust as you see fit.

Once those veggies are all cooked and happy, add in your ground beef (or turkey, pork, tofu...whatever makes you have on hand). For just the 4 boats, you probably only need about 1/2 pound of meat. But if you're planning on making the roulades, I'm sure you will find a good use for any extra stuffing.

Spoon the filling into the boats and sit them on your baking sheet. Bake them at 375 deg F for about 10-15 minutes. You just want to get everything cooked through and to give the filling a chance to hang out with the zucchini and get all friendly-like.
Once you remove them from the oven, you can customize them. I chose to top mine with some of the leftover tomato sauce from the night before. You could also add some salsa or a nice drizzle of balsamic vinegar or glaze***. Enjoy!!


And behind Door #2: Meatball-stuffed Chicken Roulade

Moving on to dinner....A couple of months back, we had bought a pack of thin-sliced chicken breasts. We ate two and froze the rest. I decided this would be the perfect time to pull them from their icy home. For roulades, these thin breasts are incredibly handy. Pretty much the trickiest part of any stuffed meat dish is getting the inside of that meat cooked. I'm not gonna lie, the first one I made and cut into (my test breast, if you will), was still a little pink where the meat met the stuffing. But I fixed it. And no one got salmonella. Win.

First, preheat your oven to 350 deg F. That done, let's move on to the stuffing- I actually did the exact same thing as I did for the stuffing in the boats, so no additional work is needed here. Just use your leftovers from the boats or follow the instructions above.

Then it's time to prep your chicken. If you dont have the skinny ones lying around, you can easily thin out what you do have. Using a good sharp knife, slice through the middle of the breast length-wise. As you cut through, pull the top half up, slicing until you cut all of the way through and have two approximately equal-sized pieces. Then grab a meat mallet, heavy pan, or whatever heavy non-breakable item is in sight, and pound out the breasts until they are about 1/2 " thick all the way through. Try to make sure one end isn't thicker than the other so you get an even cook. Season both sides with S&P, as well as anything else that might please your taste buds. 

Now, the amount of filling you place inside the chicken will depend on the size of your pieces. You want to be able to roll the sides of the chicken as well as the ends over the stuffing- much like a well-rolled burrito or egg roll. Spoon in the filling, roll up your chicken and close with a toothpick. I ended up making 4 breasts with the same amount of 4-meatball mix I made above, with a little filling left over. 

In a sautee pan (ideally one that can go straight from the stovetop to the oven), heat 2 tbsp of olive oil**. Once the pan has reached medium-high heat, set the rolls in the pan, lightly running the chicken along the pan bottom to ensure that there is a bit of oil down before you place each piece. Once you set them down, don't touch them. Let them do their thing and get brown for a couple of minutes. Then rotate the rolls, repeating the browning for all sides. Once the rolls are completely brown, they may look like they are done and ready to be eaten... 

...But this is a lie. 

There is still a layer of pink lurking inside, threatening to ruin your lovely meal. 

So- if your pan can go straight to the oven, do it- pop that whole thing straight in to your preheated oven for 8-10 minutes. If it can not, take the rolls and place them on a baking sheet. Then pop those babies in the oven, also for 8-10 minutes. When done, remove them and look at them adoringly- then invite anyone else in the house to come look at what you have created. This may just be the dog, but I'm sure he will be suitably impressed.

To serve: I have a balsamic glaze that I LOVE. It goes with so many things and is just so darn yummy. I believe it should be a household staple. So as you can see below, I simply plated the rolls whole with a drizzle of glaze and a vinegary side salad. You could also go spicy with some sriracha, maybe whip up one of the aiolis I posted here, or any other favorite condiments you might have on hand  ***


Important note: If serving whole, either remove the toothpicks ahead of time or be sure to let your guests know that the rolls hold a woody surprise!

So those are two ways that you can repurpose leftover meatballs, extra veggies, ground meat, or any combination thereof. Any other ways you like to use up these types of leftovers? I'd love to hear them!!

FMD Footnotes:

*Cooking spray = a no-no. With these, you could put a bit of broth on the bottom of the pan. Alternately, just lying down a layer of foil should still allow for caramelization without any annoying sticking.

**For FMD, use a bit of your favorite FMD-approved broth. I have mentioned it before, but I'll say it again. Bialetti Aeternum pans are awesome for getting browning without any additional fats... and without just boiling your veggies!

***Just keep your choices limited to phase-appropriate items!


Wednesday, July 29, 2015

Hey I made mayo!!

Hey guys, I made mayo! It was super easy! How exciting is that?!? *


So I made a small batch (what you see in the pic is what you get from this recipe), but it took about 5 minutes and I feel so good about it. Sure, you can get egg-free and lower fat versions of mayonnaise. But this was 5 clean ingredients and the touch of dijon added a nice bit of flavor. 

And what are those 5 ingredients? Here ya go:

1 whole egg
1.5 tsp dijon mustard
1 Tbsp lemon juice (fresh is ideal, I actually used bottled here because that's what I had)
~ 1/4 tsp himalayan sea salt
3/4 extra virgin olive oil (I have also heard grapeseed oil is great for this, but it can be a bit pricey)

2 steps:

1. Put everything but the oil in a blender or food processor and run it until you get a smooth mixture.
2. While the blender or processor is still running, drizzle the oil in. You will see the mixture start to thicken, keep going until the oil is all incorporated.

Bam. You just made mayonnaise like a cooking ninja. 

Modifications

So what do you do with it once you have made it? Whatever. you. want. If you're feeling creative, I would suggest playing with a tablespoon or two at a time, adding different flavorings to see what you like.  But if do you mess it up and an experiment ends up...not so tasty... the ingredients are so cheap and the recipe is so easy, you can just make more!! Also, you could easily make this basic recipe as-is without the dijon if you decide you don't like that flavor, don't have it on hand, or just don't want to put it in. 

My favorite so far is adding sriracha and black pepper to taste to make a sweet and spicy sriracha aioli. It goes great with crispy baked sweet potato fries (a recipe I promise to post soon). 

Some other options: 

- You could get fancy with it and add some roasted garlic when you first blend everything together for a savory, rich garlic aioli.
- Substitute lime juice for the lemon juice, add a clove or two of garlic and a handful of cilantro to the processor for a zesty cilantro aioli.
- Go crazy with seasonings. Cumin, coriander, and chile powder mixed into the prepared mayo would make an awesome Mexican-style aioli. 
- Wasssaaaabi... No, seriously- toss in some wasabi. Then run out for some fresh sashimi and go to town!

Any other ideas? Other types of aioli that you have tried or created? I'd love to hear about them!!

FMD Footnote: 
*FMD Phase 3 safe!!! 


Monday, July 27, 2015

FMD Garden Meatballs with easy sauce and zucchini noodles


Yum. So I got the basic recipe for these meatballs from the FMD blog here . I was looking for a Phase 2-friendly meal that wouldn't leave me feeling unsatisfied. As a reminder, Phase 2 of the Fast Metabolism diet is very low-carb and low-fat. So lots of meat and veggies. But tomatoes and tomato sauce are technically not allowed in Phase 2, however, so this recipe ended up developing into a P1 and P3-friendly dish. 

This recipe hits all of the right notes- the meatballs satisfy the craving for something that feels fatty, the sauteed zucchini noodles have a bit of sweetness and just a little crunch, and the tomato sauce adds spice and acidity. 

I'm going to do this in 3 chunks: I'll give the meatball recipe, talk about how to make and cook the zucchini noodles, and then review the quick and versatile tomato sauce. 

Chunk 1: Meatballs. I unfortunately failed in picture-taking on the process, but will add some the next time I make these (which I am sure will be soon)
  • You need 1 1/2 lb. of meat in total. The original recipe recommended 1/2 lb. lean ground turkey and 1 lb. lean ground beef. I opted for 1/2 lb. lean ground turkey and 1 lb. or ground pork loin. There was a sale... You can really use any combination of meats (based on phase if you're following FMD) that you want. Follow your meat bliss. 
  • 4 cups spinach
  • 4 good-size stalks of celery
  • 4 green onions, chopped
  • 1 red bell pepper
  • 1-2 tbsp Sriracha (based on personal spice preferences)
  • 1 tbsp of tamari or Bragg's liquid aminos
  • 1 7-oz. can diced mild green chiles (optional. I didn't add them, but would probably taste great, especially if you got the fire-roasted kind)
  • 1 tsp sea salt (himalayan if you got it),
  • 1/2 - 1 tsp black pepper, again based on taste
Preheat your oven to 375 deg F. Put the meat in a large bowl. Then pull out the food processor. If you don't have a food processor, just pull out the good knife and give a rough chop to the spinach. Chop the green onions. Then finely dice the celery and seed and finely dice the bell pepper. You want pieces that are small enough to mesh well with your ground meat and not just pop out of your perfectly formed meatballs.

If you do have access to a food processor, just toss each ingredient into the food processor separately. The spinach should only take a few pulses to break it into bite-sized pieces. The celery and bell pepper should also only take a few pulses.You don't want to puree it, you just want small pieces that are easier to incorporate into your meat. You will likely still want to hand-chop the green onions.

Add the veggies, sriracha, tamari or Bragg's, S&P, and chiles if you're using them. Get your hands in there and mix everything well until it is all incorporated.This recipe is meat to make 6 meal-sized servings. I found that if I made them just a hair bigger than golf-ball sized, they made exactly 24 meatballs, which = 6 four-meatball servings. Voila. I set mine in a glass 9x13 casserole dish for a perfect fit.

They will need to bake for approximately 30 minutes. I took mine out at about 20 minutes and used a turkey baster to pull out some of the excess juice that pooled at the bottom of the pan, as it tends to form that protein reside that can be unappetizing. As they cook, they may look a bit dry, but these meatballs remained remarkably moist.

While these meatballs are baking, I would suggest you work on Chunk 2: The Zucchini Noodles (and also start Chunk 3, actually...)

A few months back, I purchased a spiralizer on ebay. This has become the best $24.99 I have spent on a kitchen tool in a long time.

There are 3 different blades, so you can make 2 widths of "noodles," or more of a butterfly shape (I think of those big plates of butterflied potato chips you can buy at county fairs- it's that kind of shape). You pop a zucchini on the blade, turn the crank, and it's off to the races!


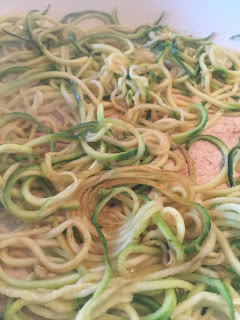
Creating zucchini pasta

Unless you have a giant zucchini, generally I have found that one zucchini per person is a filling portion. I know, it sounds like a lot. But trust me, it's how much you're gonna eat. 

Zucchini has a high water content, so in order to get a nice brown on the noodles,you need to get some of the water out. Toss these noodles with a bit of salt, and let them sit on a stack of paper towels for 5-10 minutes. Then grab some more paper towels and press down on the pile, trying to get as much water out of the noodles as you can.

Let the noodles drain


Now, here is the important part. To keep this low-fat, you want to be able to brown the noodles without using any oil or butter. The best way I have found thus far is to use the right pan. Specfically, I love this sautee pan. (Not sponsored in any way lol). I found this randomly years ago- to be honest, I really liked the red color, and the guy at the kitchen store strongly recommended it. Turns out, this pan allows you to cook things at high heat and get a nice sear/browning- mostly without sticking. 

I cook the noodles by using just a quick hit of non-stick spray**. Then I get the pan nice and hot- about a medium-high heat. Toss in the noodles and mix them around a bit so they are evenly spread and add any spices you might like. I added a liberal sprinkle of garlic powder here and a touch of salt and pepper. Step back and let them cook for a couple of minutes- you will start to see the noodles brown slightly.*** 

If you keep cooking them at a that level of heat, you should see increased browning- but they will also become softer. Stop cooking them when they have reached the level of brown and crunch/softness that you prefer. There is no wrong answer here. In this particular recipe, I preferred them a bit crunchier, I felt that heartiness held up best to the tomato sauce. 


steamy cooking zucchini
cooked noodles


Onto Chunk 3!!
The ideal time to start this would be right when the meatballs go in the oven. While you are cooking out the canned taste and infusing flavor into this sauce, the meatballs and zucchini will be cooking up all happy-like. 

Chunk 3: Sauce

I think there are a number of healthy recipes that can be made tastier and more satisfying with the addition of a good tomato sauce. My favorite tomato sauce is posted here. That can be modified by removing the butter completely. However, for this recipe, I wanted something a bit chunkier **. I was also going for quick and easy.

1 can diced tomatoes with basil and garlic already added
1 small can tomato sauce
S&P
seasonings as desired (basil, oregano, garlic powder)
optional: fresh basil, fresh garlic, chopped onion, a little EVOO

Put the diced tomatoes and sauce into a pan. Add a liberal dose of S&P to taste, as well as 1/4- 1/2 tsp of your seasonings. I like a liberal dose of additional basil, dried oregano, and garlic powder. Let it cook down for about 15 minutes- you'll notice it thicken up. About 10 minutes in, taste for seasonings. If it's too bland, punch it up. If you like spice, maybe even toss some red pepper flakes in there.

Not quite low-fat options: You can develop some additional flavor by taking a few minutes first to heat some olive oil in your sauce pan and sautee some chopped garlic and diced onions (for this amount of tomato, I would suggest 3 cloves of garlic and 1/2 of a medium onion). Add them to your sauce pan, then toss in the diced tomatoes and tomato sauce. Continue with the recipe as noted above. 

Note: Regardless of which option you choose, fresh basil is always an excellentaddition :)

Plating: Create a layer of zucchini noodles on the plate just as you would with an awesome plate of pasta. Ladle a layer of sauce. Add your meatballs and top with more sauce. Optional bits: more fresh basil and a nice dash of grated parm (unless you're on FMD, of course ;) ).

Bon appetit!

FMD Footnotes

*FMD note: I originally formulated this when I somehow misread a list, thinking tomatoes were a no, but for some reason tomato sauce was ok. It turns out this is actually best for Phases 1 and 3. For Phase 3, you could even sautee the noodles in a little olive oil and use the alternate version of the sauce with garlic and onions that I have noted. Fats! Woo!

** No cooking sprays are allowed on FMD- you can use a spritz of veggie broth instead, that should keep things moist and add some great flavor. However, you may want to lower the heat just in case the lack of a non-stick element causes the noodles to cook too fast and stick to your pan. 

*** Now for those of you on the FMD, you may want to stop here- I am told that letting veggies caramelize (even without additional fat) may bring out the natural sugars in a way that is not fitting with the plan. 


Wednesday, July 22, 2015

Healthy, tasty, oaty pancakes- FMD friendly.

So, as I mentioned recently, a few weeks ago Tyson and I took a trip to Boston. When we left, we had a list of restaurants and bars we wanted to try... you know, if we had the time. We ended up visiting 25 places in 5 1/2 days. 25. Needless to say, we came back a little...stuffed. As a result, we decided to go on a strict diet. When it comes to diets, we both thrive in programs that give you rules- specifically, rules that make sense and don't provide a lot of grey areas into which we can fit things like ice cream... After some research, we decided to try the Fast Metabolism Diet (FMD). 2 1/2 weeks in, we are both having really great results. However, I have found that I have to work to make things a bit more tasty- the recipes are satisfying physically, but mentally they leave a little something to be desired.

To give the basic rules in a nutshell: Overall, no white stuff- you know, refined flour, sugar, etc. Also no dairy. On Monday and Tuesday (Phase 1), we are able to eat healthy carbs like brown rice, sprouted grain bread, fruit, etc- but remain low fat. Wednesday and Thursday (aka the dreaded Phase 2) are the low-carb, high-protein, low-fat days. Friday-Sunday (Phase 3) are the happy days because you can add back in healthy fats like olive oil, almonds, and avocado. Plus you get fruit back, quinoa... it all feels so luxurious and naughty after that unpleasant Phase 2. 

Having said all of that- I have been looking for ways to create meals that fit within these guidelines and fulfill my psychological needs for satisfying foods. I will likely be posting a number of these experimental recipes over the next few weeks as we continue to try to alter our way of eating....and pants sizes. Some of them will be cited as coming from the FMD book, blog, or website- I am finding that the general guidelines for these recipes is great, but there are technical things that can be done that make the flavor so much better. Some of these are as simple as using the right pan or amping the basic recipe up with some bold spices. 

Let's get started! Today I present....Oat Pancakes with sugar-free berry compote

*This recipe would be FMD Phase 1 friendly, and could be Phase 3 friendly by switching the rice milk to almond milk.


This recipe is gluten-, soy-, dairy-, AND sugar-free. That's right- I have taken all  of the fun out of these pancakes...and they're still good! I will say that the first bite was a bit of a surprise- they do taste kind of like oatmeal. They won't be the fluffy, light pancakes you're used to, but I liked them and Tyson didn't complain...

Makes approx 12 3" pancakes, I did 3 pancakes per serving for a total of 4 servings.

Pancake Ingredients:

1 1/2 cups oats (I used rolled oats- please see the *Note below for info regarding steel-cut oats)
1/2 tsp. baking powder
1/4 tsp. himalayan sea salt (if possible- other salts would work just fine)
1/2 tsp of your seasoning(s) of choice. I really like pumpkin pie spice because it has all of the good stuff. Cinnamon would be great as well, some nutmeg, whatever strikes your fancy. 
2 egg whites (6 tbsp if you get the cartons of egg whites alone)
1 cup rice milk- you can also use any dairy or non-dairy product of your choice. If you are good with dairy (and some fat), I am betting buttermilk would make these super fluffy and lighter than they would be otherwise. 
1/2 tsp pure vanilla extract

First, you're going to feel like a cooking guru when you make flour. Put the 1 1/2 cups of oats into a food processor or strong blender. Press start. Watch as you create flour. Bam. That just happened.

*Oat Note: I have tried making these with steel-cut oats as well. Unless you have an industrial food processor, it was much more difficult to turn these into a fine flour. I ended up passing the flour through a sieve to get the larger chunks out:

Processed steel-cut oats

Sieved steel-cut flour
The remaining oat bits.


Also, the flour really soaked up all of my moisture as the batter sat. I ended up adding a splash more of the rice milk to thin the batter back out.

Once you have settled on a flour and made it like a cooking ninja, mix all of your dry ingredients in a large bowl. Mix the wet ingredients together in a smaller bowl. Whisk the wet ingredients to get the egg whites a little fluffy. The oat flour will be a bit dense, any extra air you can get in the whites will help fluff them up a bit. Pour the wet ingredients into the bowl of dry ingredients, mixing just until the dry ingredients are incorporated. 

Spritz a little non-stick spray onto your pan and heat it to about medium heat*. Ladle a scoop of batter in to make an approximately 3" diameter pancake. Or make it bigger. This is your party. But keep in mind you're gonna have to flip this beast at some point...

When you see bubbles forming on the surface, slide your spatula underneath to see if it looks like the cake is going to come with you willingly. If it feels a little wobbly, let it sit a little longer. This shouldn't take too long, but keep in mind that these pancakes are a bit more dense than your standard cake, so it will be a bit longer than usual. Flip the pancakes when ready- at this point, they should only need a few more minutes once they are flipped. 

Now for the topping... **
As I mentioned, the basic recipe for this stuff is sugar-free. That means that the sweetness comes from your fruit. If your fruit is tart, then this sauce is going to be a bit tart. So let's talk about your options if you want to sweeten it up. If you are looking for a natural no-sugar option, honey would be great and agave would also work. If you want a no-calorie sweetener, stevia, truvia, and xylitol would all also work (The latter would be the FMD options). 

The basic recipe for any compote is so simple, it's crazy. The amounts below should be sufficient for the amount of pancakes in the recipe above:

Compote: 
2 cups berries- or whatever fruit you like. I added apricots in my last batch just because they were getting soft. Your fruit can also be fresh or frozen.
If fresh- add about 1/4 cup of water. If frozen, the ice on the fruit should melt as it cooks- this will do the same job. 
~1 tbsp lemon juice...you can add a tsp of zest too if you're feeling fancy. 

Toss all of this into a pan, cook over medium heat. Also, this is when you should add any spices you might like. To stick with healthier items, I like to add some spices like cinnamon and nutmeg, and maybe even a splash of vanilla.  If you are ok with sugar, you can use any of the options I mentioned above. I would start with 1 tbsp of honey, 1 tbsp of agave, or 1/2 tbsp sugar (or the sugar-substitue equivalent).

Then you just let it all hang out and break down into a beautiful sauce. Don't be afraid to let this just go for as little as 10 and up to 20  minutes or so, stirring occasionally to make sure it doesn't stick to the bottom. The longer it cooks, the thicker it gets.

Berries are starting to break down
Complete compote- thick and rich


Once it has cooked down to your desired thickness, taste it do decide if you want to add more of your chosen sweetener or spices.

Now, the only thing left to do is plate it up, make it pretty, and enjoy!

I was feeling whimsical the last time I made these... you know those little drips you sometimes get when you make pancakes? I decided to go ahead and flip them over to create a handful of mini pancakes. Then I really got fancy with it:

Amuse bouche? Hamster breakfast? Exercise in perspective? Or just someone who watches way too much Food Network...?

Fortunately, Tyson also got his normal-sized plate....

Actual Human-sized portion 

FMD Footnotes:
* Cooking spray is a no-no on all phases. As long as you use a standard non-stick pan and don't set the heat too high, these should cook up just fine. I would not recommend these in a non non-stick pan... Also, if you are using a non-stick pan and you notice them starting to stick, that means your heat is too high. Reduce the heat and remove the pan from the burner for a minute while things cool down. The pan should release it's pancake hostage and allow you to continue cooking. 

** I have been informed that you are not allowed to cook fruit on FMD, only warm it...so you won't get the broken-down compote that I have here. I would suggest slightly mashing your berries with a fork or potato masher and then cooking slowly until warm!