Wednesday, July 29, 2015

Hey I made mayo!!

Hey guys, I made mayo! It was super easy! How exciting is that?!? *


So I made a small batch (what you see in the pic is what you get from this recipe), but it took about 5 minutes and I feel so good about it. Sure, you can get egg-free and lower fat versions of mayonnaise. But this was 5 clean ingredients and the touch of dijon added a nice bit of flavor. 

And what are those 5 ingredients? Here ya go:

1 whole egg
1.5 tsp dijon mustard
1 Tbsp lemon juice (fresh is ideal, I actually used bottled here because that's what I had)
~ 1/4 tsp himalayan sea salt
3/4 extra virgin olive oil (I have also heard grapeseed oil is great for this, but it can be a bit pricey)

2 steps:

1. Put everything but the oil in a blender or food processor and run it until you get a smooth mixture.
2. While the blender or processor is still running, drizzle the oil in. You will see the mixture start to thicken, keep going until the oil is all incorporated.

Bam. You just made mayonnaise like a cooking ninja. 

Modifications

So what do you do with it once you have made it? Whatever. you. want. If you're feeling creative, I would suggest playing with a tablespoon or two at a time, adding different flavorings to see what you like.  But if do you mess it up and an experiment ends up...not so tasty... the ingredients are so cheap and the recipe is so easy, you can just make more!! Also, you could easily make this basic recipe as-is without the dijon if you decide you don't like that flavor, don't have it on hand, or just don't want to put it in. 

My favorite so far is adding sriracha and black pepper to taste to make a sweet and spicy sriracha aioli. It goes great with crispy baked sweet potato fries (a recipe I promise to post soon). 

Some other options: 

- You could get fancy with it and add some roasted garlic when you first blend everything together for a savory, rich garlic aioli.
- Substitute lime juice for the lemon juice, add a clove or two of garlic and a handful of cilantro to the processor for a zesty cilantro aioli.
- Go crazy with seasonings. Cumin, coriander, and chile powder mixed into the prepared mayo would make an awesome Mexican-style aioli. 
- Wasssaaaabi... No, seriously- toss in some wasabi. Then run out for some fresh sashimi and go to town!

Any other ideas? Other types of aioli that you have tried or created? I'd love to hear about them!!

FMD Footnote: 
*FMD Phase 3 safe!!! 


Monday, July 27, 2015

FMD Garden Meatballs with easy sauce and zucchini noodles


Yum. So I got the basic recipe for these meatballs from the FMD blog here . I was looking for a Phase 2-friendly meal that wouldn't leave me feeling unsatisfied. As a reminder, Phase 2 of the Fast Metabolism diet is very low-carb and low-fat. So lots of meat and veggies. But tomatoes and tomato sauce are technically not allowed in Phase 2, however, so this recipe ended up developing into a P1 and P3-friendly dish. 

This recipe hits all of the right notes- the meatballs satisfy the craving for something that feels fatty, the sauteed zucchini noodles have a bit of sweetness and just a little crunch, and the tomato sauce adds spice and acidity. 

I'm going to do this in 3 chunks: I'll give the meatball recipe, talk about how to make and cook the zucchini noodles, and then review the quick and versatile tomato sauce. 

Chunk 1: Meatballs. I unfortunately failed in picture-taking on the process, but will add some the next time I make these (which I am sure will be soon)
  • You need 1 1/2 lb. of meat in total. The original recipe recommended 1/2 lb. lean ground turkey and 1 lb. lean ground beef. I opted for 1/2 lb. lean ground turkey and 1 lb. or ground pork loin. There was a sale... You can really use any combination of meats (based on phase if you're following FMD) that you want. Follow your meat bliss. 
  • 4 cups spinach
  • 4 good-size stalks of celery
  • 4 green onions, chopped
  • 1 red bell pepper
  • 1-2 tbsp Sriracha (based on personal spice preferences)
  • 1 tbsp of tamari or Bragg's liquid aminos
  • 1 7-oz. can diced mild green chiles (optional. I didn't add them, but would probably taste great, especially if you got the fire-roasted kind)
  • 1 tsp sea salt (himalayan if you got it),
  • 1/2 - 1 tsp black pepper, again based on taste
Preheat your oven to 375 deg F. Put the meat in a large bowl. Then pull out the food processor. If you don't have a food processor, just pull out the good knife and give a rough chop to the spinach. Chop the green onions. Then finely dice the celery and seed and finely dice the bell pepper. You want pieces that are small enough to mesh well with your ground meat and not just pop out of your perfectly formed meatballs.

If you do have access to a food processor, just toss each ingredient into the food processor separately. The spinach should only take a few pulses to break it into bite-sized pieces. The celery and bell pepper should also only take a few pulses.You don't want to puree it, you just want small pieces that are easier to incorporate into your meat. You will likely still want to hand-chop the green onions.

Add the veggies, sriracha, tamari or Bragg's, S&P, and chiles if you're using them. Get your hands in there and mix everything well until it is all incorporated.This recipe is meat to make 6 meal-sized servings. I found that if I made them just a hair bigger than golf-ball sized, they made exactly 24 meatballs, which = 6 four-meatball servings. Voila. I set mine in a glass 9x13 casserole dish for a perfect fit.

They will need to bake for approximately 30 minutes. I took mine out at about 20 minutes and used a turkey baster to pull out some of the excess juice that pooled at the bottom of the pan, as it tends to form that protein reside that can be unappetizing. As they cook, they may look a bit dry, but these meatballs remained remarkably moist.

While these meatballs are baking, I would suggest you work on Chunk 2: The Zucchini Noodles (and also start Chunk 3, actually...)

A few months back, I purchased a spiralizer on ebay. This has become the best $24.99 I have spent on a kitchen tool in a long time.

There are 3 different blades, so you can make 2 widths of "noodles," or more of a butterfly shape (I think of those big plates of butterflied potato chips you can buy at county fairs- it's that kind of shape). You pop a zucchini on the blade, turn the crank, and it's off to the races!


Creating zucchini pasta

Unless you have a giant zucchini, generally I have found that one zucchini per person is a filling portion. I know, it sounds like a lot. But trust me, it's how much you're gonna eat. 

Zucchini has a high water content, so in order to get a nice brown on the noodles,you need to get some of the water out. Toss these noodles with a bit of salt, and let them sit on a stack of paper towels for 5-10 minutes. Then grab some more paper towels and press down on the pile, trying to get as much water out of the noodles as you can.

Let the noodles drain


Now, here is the important part. To keep this low-fat, you want to be able to brown the noodles without using any oil or butter. The best way I have found thus far is to use the right pan. Specfically, I love this sautee pan. (Not sponsored in any way lol). I found this randomly years ago- to be honest, I really liked the red color, and the guy at the kitchen store strongly recommended it. Turns out, this pan allows you to cook things at high heat and get a nice sear/browning- mostly without sticking. 

I cook the noodles by using just a quick hit of non-stick spray**. Then I get the pan nice and hot- about a medium-high heat. Toss in the noodles and mix them around a bit so they are evenly spread and add any spices you might like. I added a liberal sprinkle of garlic powder here and a touch of salt and pepper. Step back and let them cook for a couple of minutes- you will start to see the noodles brown slightly.*** 

If you keep cooking them at a that level of heat, you should see increased browning- but they will also become softer. Stop cooking them when they have reached the level of brown and crunch/softness that you prefer. There is no wrong answer here. In this particular recipe, I preferred them a bit crunchier, I felt that heartiness held up best to the tomato sauce. 


steamy cooking zucchini
cooked noodles


Onto Chunk 3!!
The ideal time to start this would be right when the meatballs go in the oven. While you are cooking out the canned taste and infusing flavor into this sauce, the meatballs and zucchini will be cooking up all happy-like. 

Chunk 3: Sauce

I think there are a number of healthy recipes that can be made tastier and more satisfying with the addition of a good tomato sauce. My favorite tomato sauce is posted here. That can be modified by removing the butter completely. However, for this recipe, I wanted something a bit chunkier **. I was also going for quick and easy.

1 can diced tomatoes with basil and garlic already added
1 small can tomato sauce
S&P
seasonings as desired (basil, oregano, garlic powder)
optional: fresh basil, fresh garlic, chopped onion, a little EVOO

Put the diced tomatoes and sauce into a pan. Add a liberal dose of S&P to taste, as well as 1/4- 1/2 tsp of your seasonings. I like a liberal dose of additional basil, dried oregano, and garlic powder. Let it cook down for about 15 minutes- you'll notice it thicken up. About 10 minutes in, taste for seasonings. If it's too bland, punch it up. If you like spice, maybe even toss some red pepper flakes in there.

Not quite low-fat options: You can develop some additional flavor by taking a few minutes first to heat some olive oil in your sauce pan and sautee some chopped garlic and diced onions (for this amount of tomato, I would suggest 3 cloves of garlic and 1/2 of a medium onion). Add them to your sauce pan, then toss in the diced tomatoes and tomato sauce. Continue with the recipe as noted above. 

Note: Regardless of which option you choose, fresh basil is always an excellentaddition :)

Plating: Create a layer of zucchini noodles on the plate just as you would with an awesome plate of pasta. Ladle a layer of sauce. Add your meatballs and top with more sauce. Optional bits: more fresh basil and a nice dash of grated parm (unless you're on FMD, of course ;) ).

Bon appetit!

FMD Footnotes

*FMD note: I originally formulated this when I somehow misread a list, thinking tomatoes were a no, but for some reason tomato sauce was ok. It turns out this is actually best for Phases 1 and 3. For Phase 3, you could even sautee the noodles in a little olive oil and use the alternate version of the sauce with garlic and onions that I have noted. Fats! Woo!

** No cooking sprays are allowed on FMD- you can use a spritz of veggie broth instead, that should keep things moist and add some great flavor. However, you may want to lower the heat just in case the lack of a non-stick element causes the noodles to cook too fast and stick to your pan. 

*** Now for those of you on the FMD, you may want to stop here- I am told that letting veggies caramelize (even without additional fat) may bring out the natural sugars in a way that is not fitting with the plan. 


Wednesday, July 22, 2015

Healthy, tasty, oaty pancakes- FMD friendly.

So, as I mentioned recently, a few weeks ago Tyson and I took a trip to Boston. When we left, we had a list of restaurants and bars we wanted to try... you know, if we had the time. We ended up visiting 25 places in 5 1/2 days. 25. Needless to say, we came back a little...stuffed. As a result, we decided to go on a strict diet. When it comes to diets, we both thrive in programs that give you rules- specifically, rules that make sense and don't provide a lot of grey areas into which we can fit things like ice cream... After some research, we decided to try the Fast Metabolism Diet (FMD). 2 1/2 weeks in, we are both having really great results. However, I have found that I have to work to make things a bit more tasty- the recipes are satisfying physically, but mentally they leave a little something to be desired.

To give the basic rules in a nutshell: Overall, no white stuff- you know, refined flour, sugar, etc. Also no dairy. On Monday and Tuesday (Phase 1), we are able to eat healthy carbs like brown rice, sprouted grain bread, fruit, etc- but remain low fat. Wednesday and Thursday (aka the dreaded Phase 2) are the low-carb, high-protein, low-fat days. Friday-Sunday (Phase 3) are the happy days because you can add back in healthy fats like olive oil, almonds, and avocado. Plus you get fruit back, quinoa... it all feels so luxurious and naughty after that unpleasant Phase 2. 

Having said all of that- I have been looking for ways to create meals that fit within these guidelines and fulfill my psychological needs for satisfying foods. I will likely be posting a number of these experimental recipes over the next few weeks as we continue to try to alter our way of eating....and pants sizes. Some of them will be cited as coming from the FMD book, blog, or website- I am finding that the general guidelines for these recipes is great, but there are technical things that can be done that make the flavor so much better. Some of these are as simple as using the right pan or amping the basic recipe up with some bold spices. 

Let's get started! Today I present....Oat Pancakes with sugar-free berry compote

*This recipe would be FMD Phase 1 friendly, and could be Phase 3 friendly by switching the rice milk to almond milk.


This recipe is gluten-, soy-, dairy-, AND sugar-free. That's right- I have taken all  of the fun out of these pancakes...and they're still good! I will say that the first bite was a bit of a surprise- they do taste kind of like oatmeal. They won't be the fluffy, light pancakes you're used to, but I liked them and Tyson didn't complain...

Makes approx 12 3" pancakes, I did 3 pancakes per serving for a total of 4 servings.

Pancake Ingredients:

1 1/2 cups oats (I used rolled oats- please see the *Note below for info regarding steel-cut oats)
1/2 tsp. baking powder
1/4 tsp. himalayan sea salt (if possible- other salts would work just fine)
1/2 tsp of your seasoning(s) of choice. I really like pumpkin pie spice because it has all of the good stuff. Cinnamon would be great as well, some nutmeg, whatever strikes your fancy. 
2 egg whites (6 tbsp if you get the cartons of egg whites alone)
1 cup rice milk- you can also use any dairy or non-dairy product of your choice. If you are good with dairy (and some fat), I am betting buttermilk would make these super fluffy and lighter than they would be otherwise. 
1/2 tsp pure vanilla extract

First, you're going to feel like a cooking guru when you make flour. Put the 1 1/2 cups of oats into a food processor or strong blender. Press start. Watch as you create flour. Bam. That just happened.

*Oat Note: I have tried making these with steel-cut oats as well. Unless you have an industrial food processor, it was much more difficult to turn these into a fine flour. I ended up passing the flour through a sieve to get the larger chunks out:

Processed steel-cut oats

Sieved steel-cut flour
The remaining oat bits.


Also, the flour really soaked up all of my moisture as the batter sat. I ended up adding a splash more of the rice milk to thin the batter back out.

Once you have settled on a flour and made it like a cooking ninja, mix all of your dry ingredients in a large bowl. Mix the wet ingredients together in a smaller bowl. Whisk the wet ingredients to get the egg whites a little fluffy. The oat flour will be a bit dense, any extra air you can get in the whites will help fluff them up a bit. Pour the wet ingredients into the bowl of dry ingredients, mixing just until the dry ingredients are incorporated. 

Spritz a little non-stick spray onto your pan and heat it to about medium heat*. Ladle a scoop of batter in to make an approximately 3" diameter pancake. Or make it bigger. This is your party. But keep in mind you're gonna have to flip this beast at some point...

When you see bubbles forming on the surface, slide your spatula underneath to see if it looks like the cake is going to come with you willingly. If it feels a little wobbly, let it sit a little longer. This shouldn't take too long, but keep in mind that these pancakes are a bit more dense than your standard cake, so it will be a bit longer than usual. Flip the pancakes when ready- at this point, they should only need a few more minutes once they are flipped. 

Now for the topping... **
As I mentioned, the basic recipe for this stuff is sugar-free. That means that the sweetness comes from your fruit. If your fruit is tart, then this sauce is going to be a bit tart. So let's talk about your options if you want to sweeten it up. If you are looking for a natural no-sugar option, honey would be great and agave would also work. If you want a no-calorie sweetener, stevia, truvia, and xylitol would all also work (The latter would be the FMD options). 

The basic recipe for any compote is so simple, it's crazy. The amounts below should be sufficient for the amount of pancakes in the recipe above:

Compote: 
2 cups berries- or whatever fruit you like. I added apricots in my last batch just because they were getting soft. Your fruit can also be fresh or frozen.
If fresh- add about 1/4 cup of water. If frozen, the ice on the fruit should melt as it cooks- this will do the same job. 
~1 tbsp lemon juice...you can add a tsp of zest too if you're feeling fancy. 

Toss all of this into a pan, cook over medium heat. Also, this is when you should add any spices you might like. To stick with healthier items, I like to add some spices like cinnamon and nutmeg, and maybe even a splash of vanilla.  If you are ok with sugar, you can use any of the options I mentioned above. I would start with 1 tbsp of honey, 1 tbsp of agave, or 1/2 tbsp sugar (or the sugar-substitue equivalent).

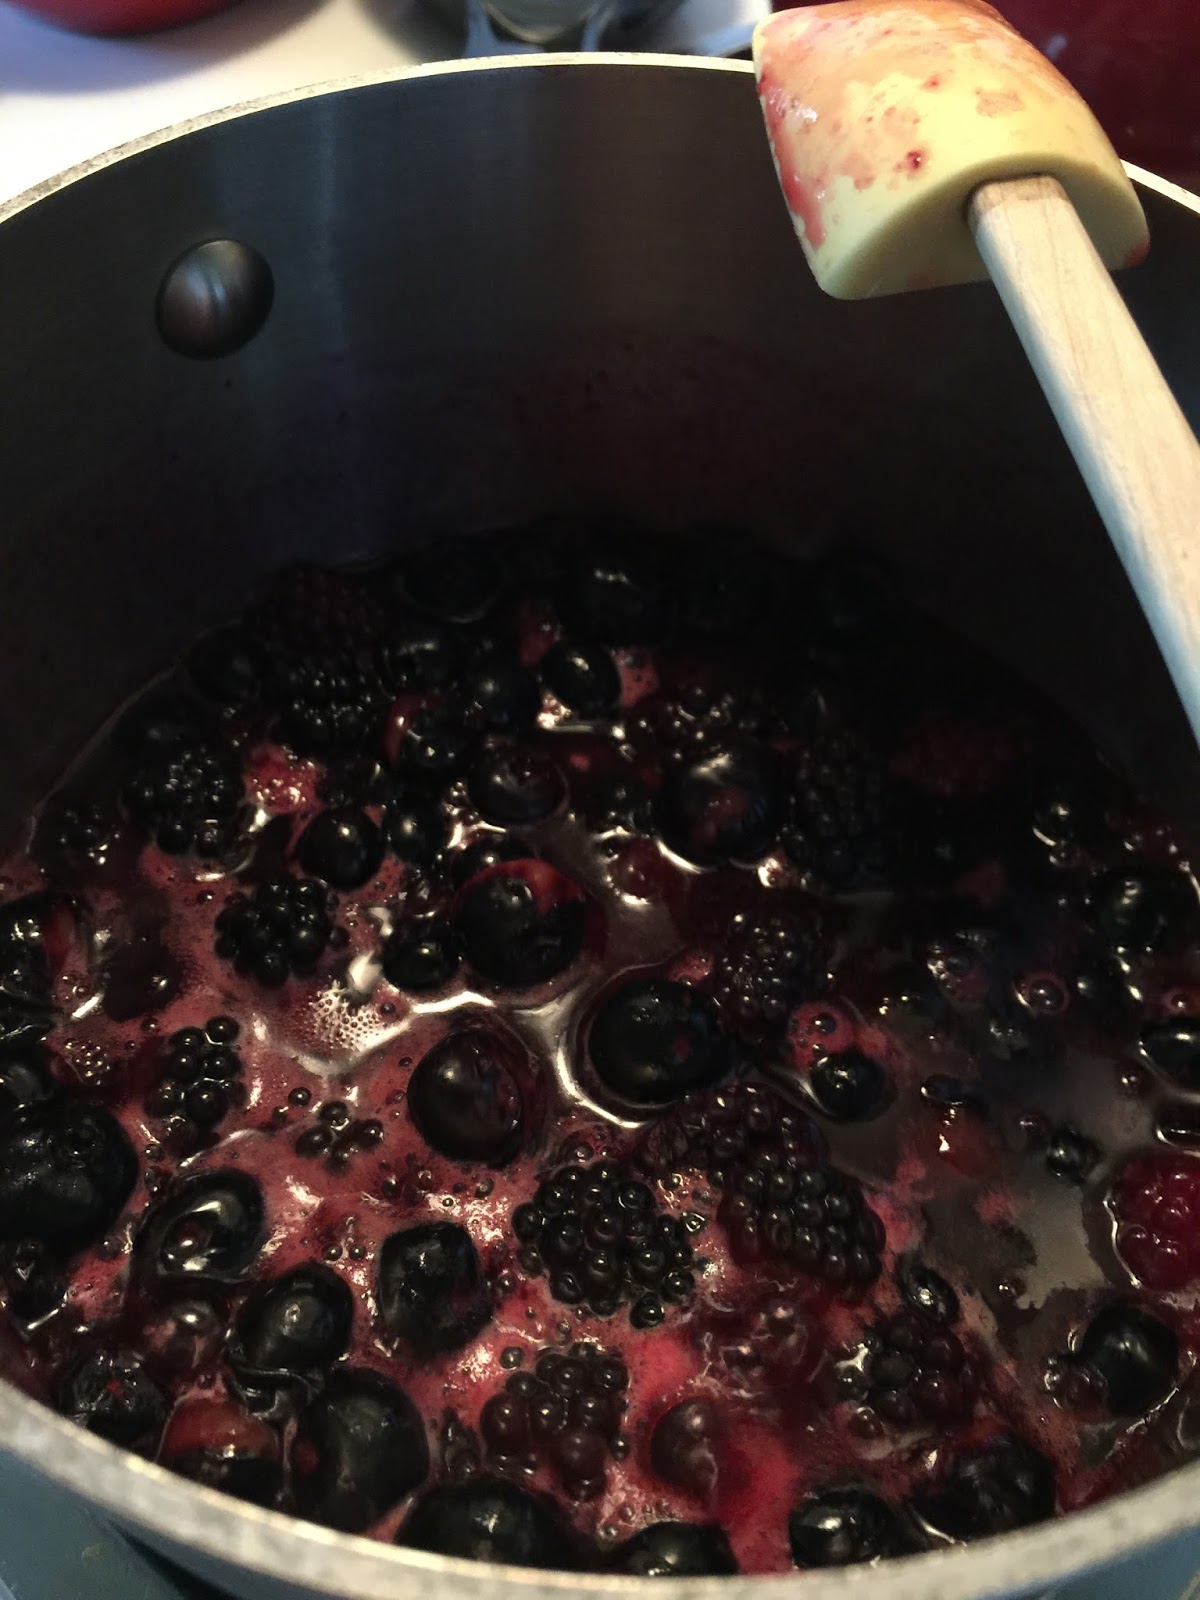
Then you just let it all hang out and break down into a beautiful sauce. Don't be afraid to let this just go for as little as 10 and up to 20  minutes or so, stirring occasionally to make sure it doesn't stick to the bottom. The longer it cooks, the thicker it gets.

Berries are starting to break down
Complete compote- thick and rich


Once it has cooked down to your desired thickness, taste it do decide if you want to add more of your chosen sweetener or spices.

Now, the only thing left to do is plate it up, make it pretty, and enjoy!

I was feeling whimsical the last time I made these... you know those little drips you sometimes get when you make pancakes? I decided to go ahead and flip them over to create a handful of mini pancakes. Then I really got fancy with it:

Amuse bouche? Hamster breakfast? Exercise in perspective? Or just someone who watches way too much Food Network...?

Fortunately, Tyson also got his normal-sized plate....

Actual Human-sized portion 

FMD Footnotes:
* Cooking spray is a no-no on all phases. As long as you use a standard non-stick pan and don't set the heat too high, these should cook up just fine. I would not recommend these in a non non-stick pan... Also, if you are using a non-stick pan and you notice them starting to stick, that means your heat is too high. Reduce the heat and remove the pan from the burner for a minute while things cool down. The pan should release it's pancake hostage and allow you to continue cooking. 

** I have been informed that you are not allowed to cook fruit on FMD, only warm it...so you won't get the broken-down compote that I have here. I would suggest slightly mashing your berries with a fork or potato masher and then cooking slowly until warm!


Thursday, July 16, 2015

The blog is back!!

Hello anyone that is reading this! So after a two-year hiatus, I have decided to revive this blog. This is in large part due to having a buildup of recipes and pictures that are doing absolutely nothing but floating around aimlessly in the cloud... it seemed like such a waste to let them wither and die in the ether....I might as well put them to some good use. 

Since there is a bit of a backlog, I'll try not to release too many at one time. I should also point out that we recently went on a debaucherous trip to Boston, stopping at 25 (yes, 25!!) restaurants over the course of 5 1/2 days. Upon our return, we decided to go on a rigorous clean eating program, using some of the principles outlined in the Fast Metabolism Diet. It seems to be working, but it could also be the result of us just not eating at 5 restaurants a day. The science on this is unclear.

So some of the recipes I post will be things inspired by the FMD that we have found to be tasty. Often, the original recipes have benefitted from the use of super-secret techniques (which I may be persuaded to share) that build flavor without adding all of the stuff that made us get fat.

This dog is my spirit animal
Other than that, I will continue to post tasty, mostly healthy things,some not. Tyson (a new to-be-recurring character in this blog) has also suggested that we might add some restaurant reviews when we try something new and exciting. I am not opposed to this suggestion, so you may see some of those as well. I can almost guarantee that those posts will fall under the "some not" category. Sometimes, you just have to have fatty, gooey, crispy things. And donuts. Don't forget donuts. 

See you soon...